Product attributes - What you need to know


We are thrilled to announce the addition of custom product attributes in the dashboard. This update helps you to customize and extend your product workflow and build complex product models that fit your businesses needs.
Let’s learn what has changed and how you can use attributes to better your eCommerce experience.
What are product attributes?
Attributes are custom field types that you can attach to your products, and so customizing or extending the data attached to it. New attribute fields that are created are then shown on your individual products.
 Let’s say your products have a specific packaging size that you want to display on your front-end. You could create an attribute of the type short text and each product would adopt this new field. After it’s been filled out, you will be able to access this data from the "get product" API call. Another example is if your products page has specific content blocks like reviews or sub headers that you only want visible on specific products, you could create a multi-select options field to define which sections are visible on your product page.
Previously, this was all possible with the meta attribute, but using attributes you will now be able to access this data from the dashboard, as well as the API. This makes it easier for you or your clients to modify your product model without having to resort to code only features.
What types of product attributes can I create?
Currently we support the following field types for your attributes.
| Type | Example |
|---|---|
| Short text: A field for setting strings under 255 characters. This will display as a text field in the products page. |
Dimensions, stock location, brand. |
| Long text: Creates a long form field for larger blocks of text. This will display as a multi-line text field in the products page. |
Product page content blocks, assembly instructions. |
| Number: A numeric field. This field will display as a number field in the products page. |
Product weight, height, production time in hours. |
| Date: A date field which will display as a date picker on the dashboard. |
Coffee roast date, publish date, best before date. |
| Checkbox: A boolean field which will display as a check box on the products page. |
Includes gift wrapping, displays custom background on the product page. |
| Radio: Creates a radio options field which will be displayed as a radio option group in the products page. |
Packaging type, product page template |
| Options: Shows as a dropdown field on the dashboard. This can be toggled between single or multi-select. |
What’s included in the box, product page options. |
How do I create an attribute?
You can either create an attribute using the "create attribute" API endpoint or through the attributes manager on the dashboard. Below we’ll detail both ways.
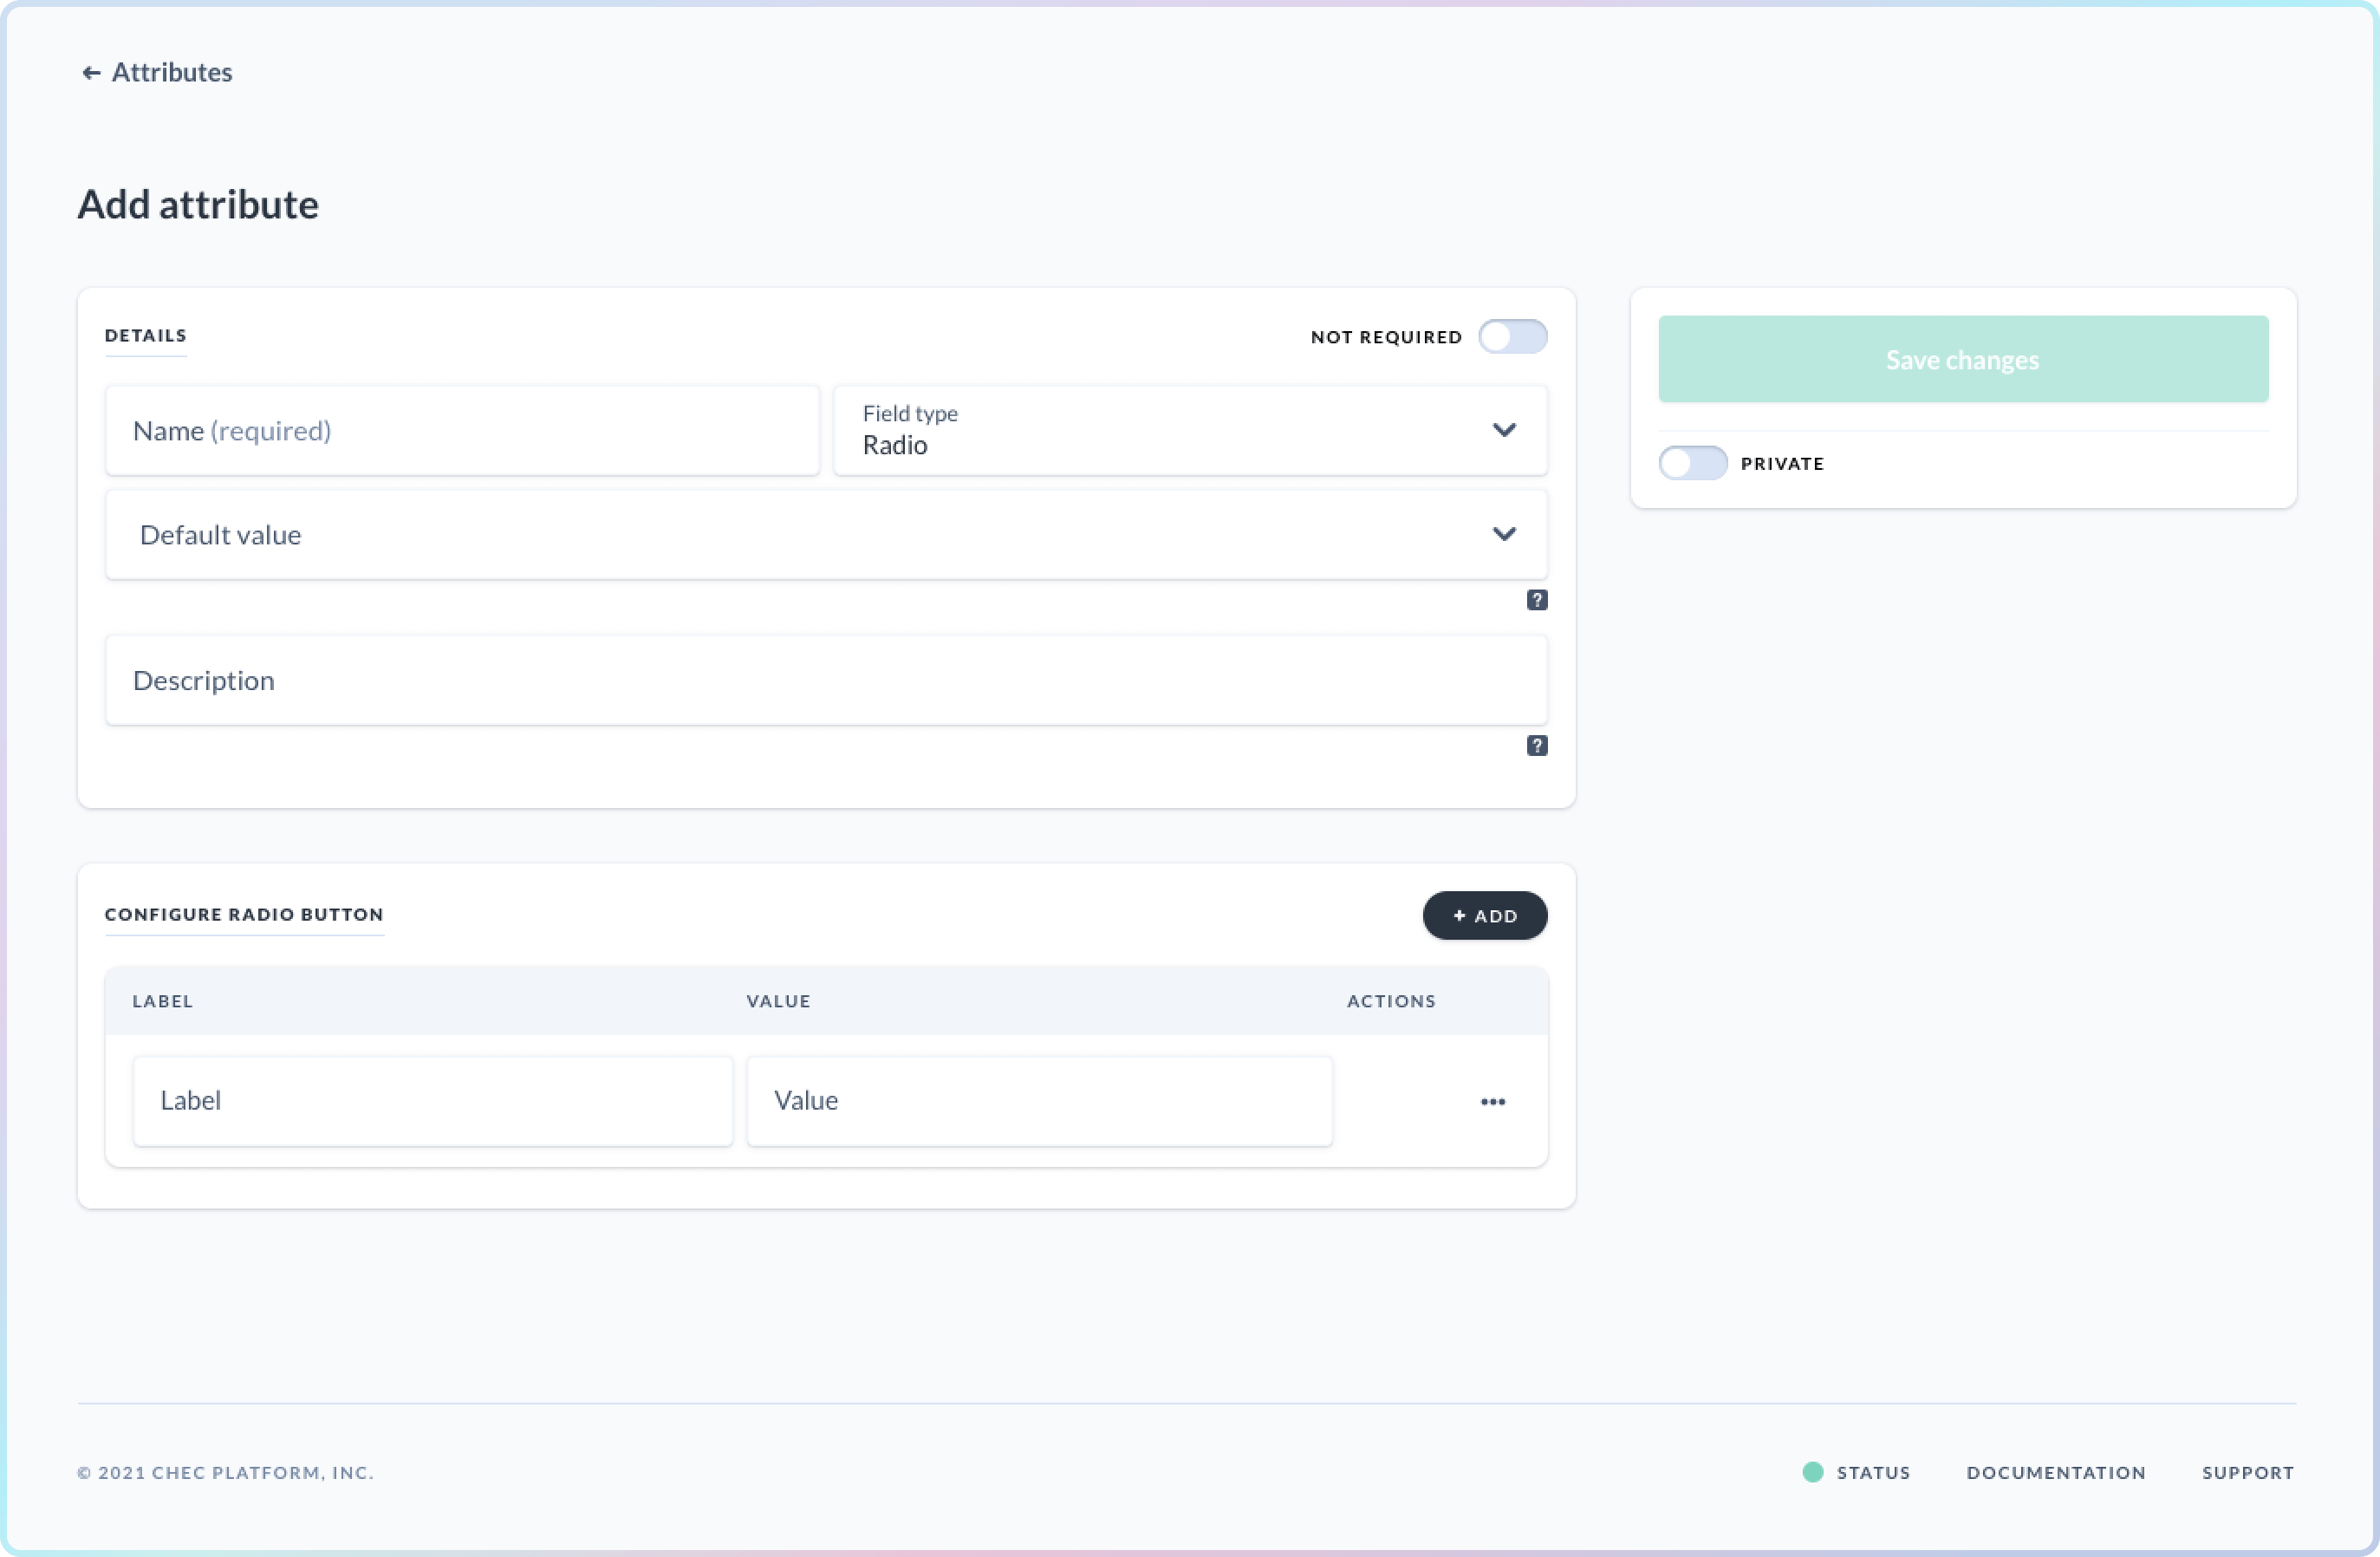
First, head to the attributes page in the settings section of the dashboard. Here you’ll be presented with a listing of any attributes you create and the option to create more. Once on the add attribute page, you will be presented with a number of configuration options.
Name: This is the display name of the attribute.
Field type: The type of the attribute you want to create
Default value: A value that will be adopted by all instances of the attribute until changed.
Description: An internal use description for adding more context to an attribute.
Required: If this attribute should be required or not on the product.
Make visible to the public API: Make this attribute available on the product object using the public API key. If you make the attribute hidden, it will only be visible with a secret key.
The configuration card will only be visible if radio or options is selected. This will allow you to add and remove the different options for that attribute. If using the options attribute you can even allow it to be multi-select capable.
 Once you’ve configured your attribute to your liking, simply save it and it will be adopted by all products.
If you prefer to use the API, simply pass the name, type, and any additional configuration to the "create attribute" endpoint. See the API reference for more details.
Endpoint:
https://api.chec.io/v1/attributes
Example object:
{
  name: 'Stock location',
  type: 'options',
  default_value: 'New Jersey',
  is_public: false,
  meta: null,
  is_multiselect: false, // Only required for options attribute type.
  required: true,
  options: [
    {
      value: 'NewJersey',
      label: 'New Jersey',
    },
    {
      value: 'SantaMonica',
      label: 'Santa Monica',
    },
  ],
}
How do I use my attributes?
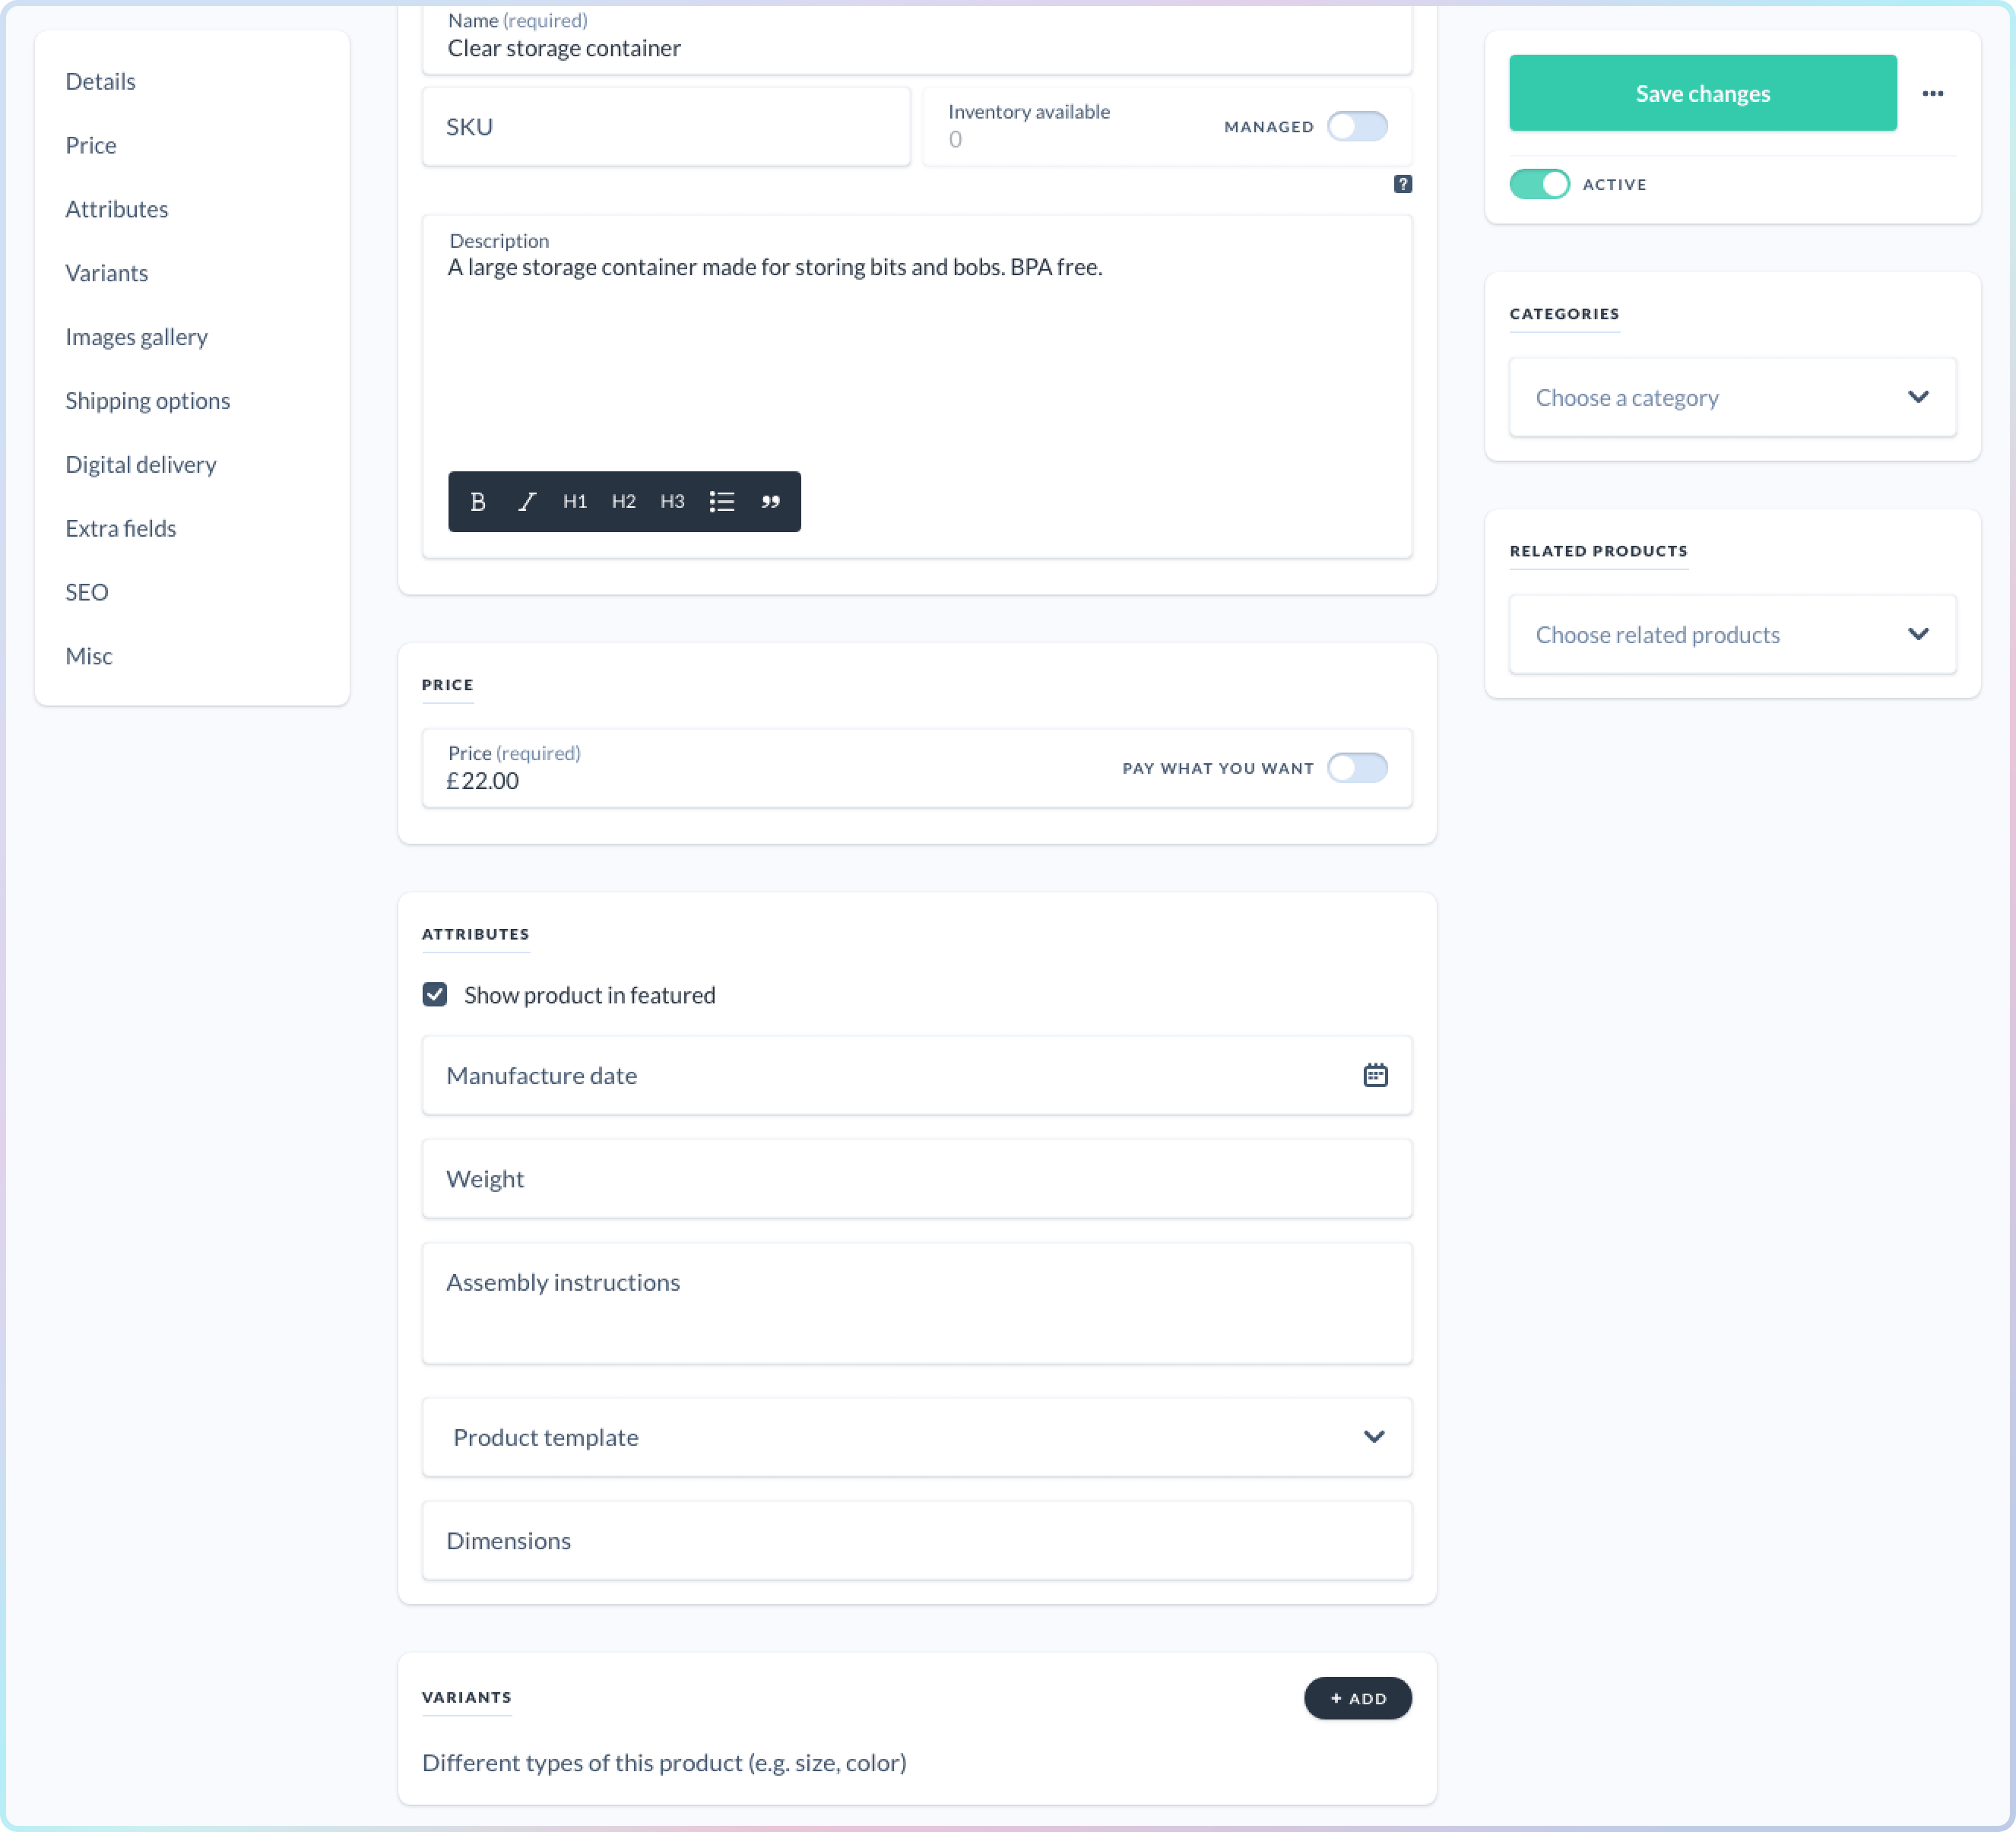
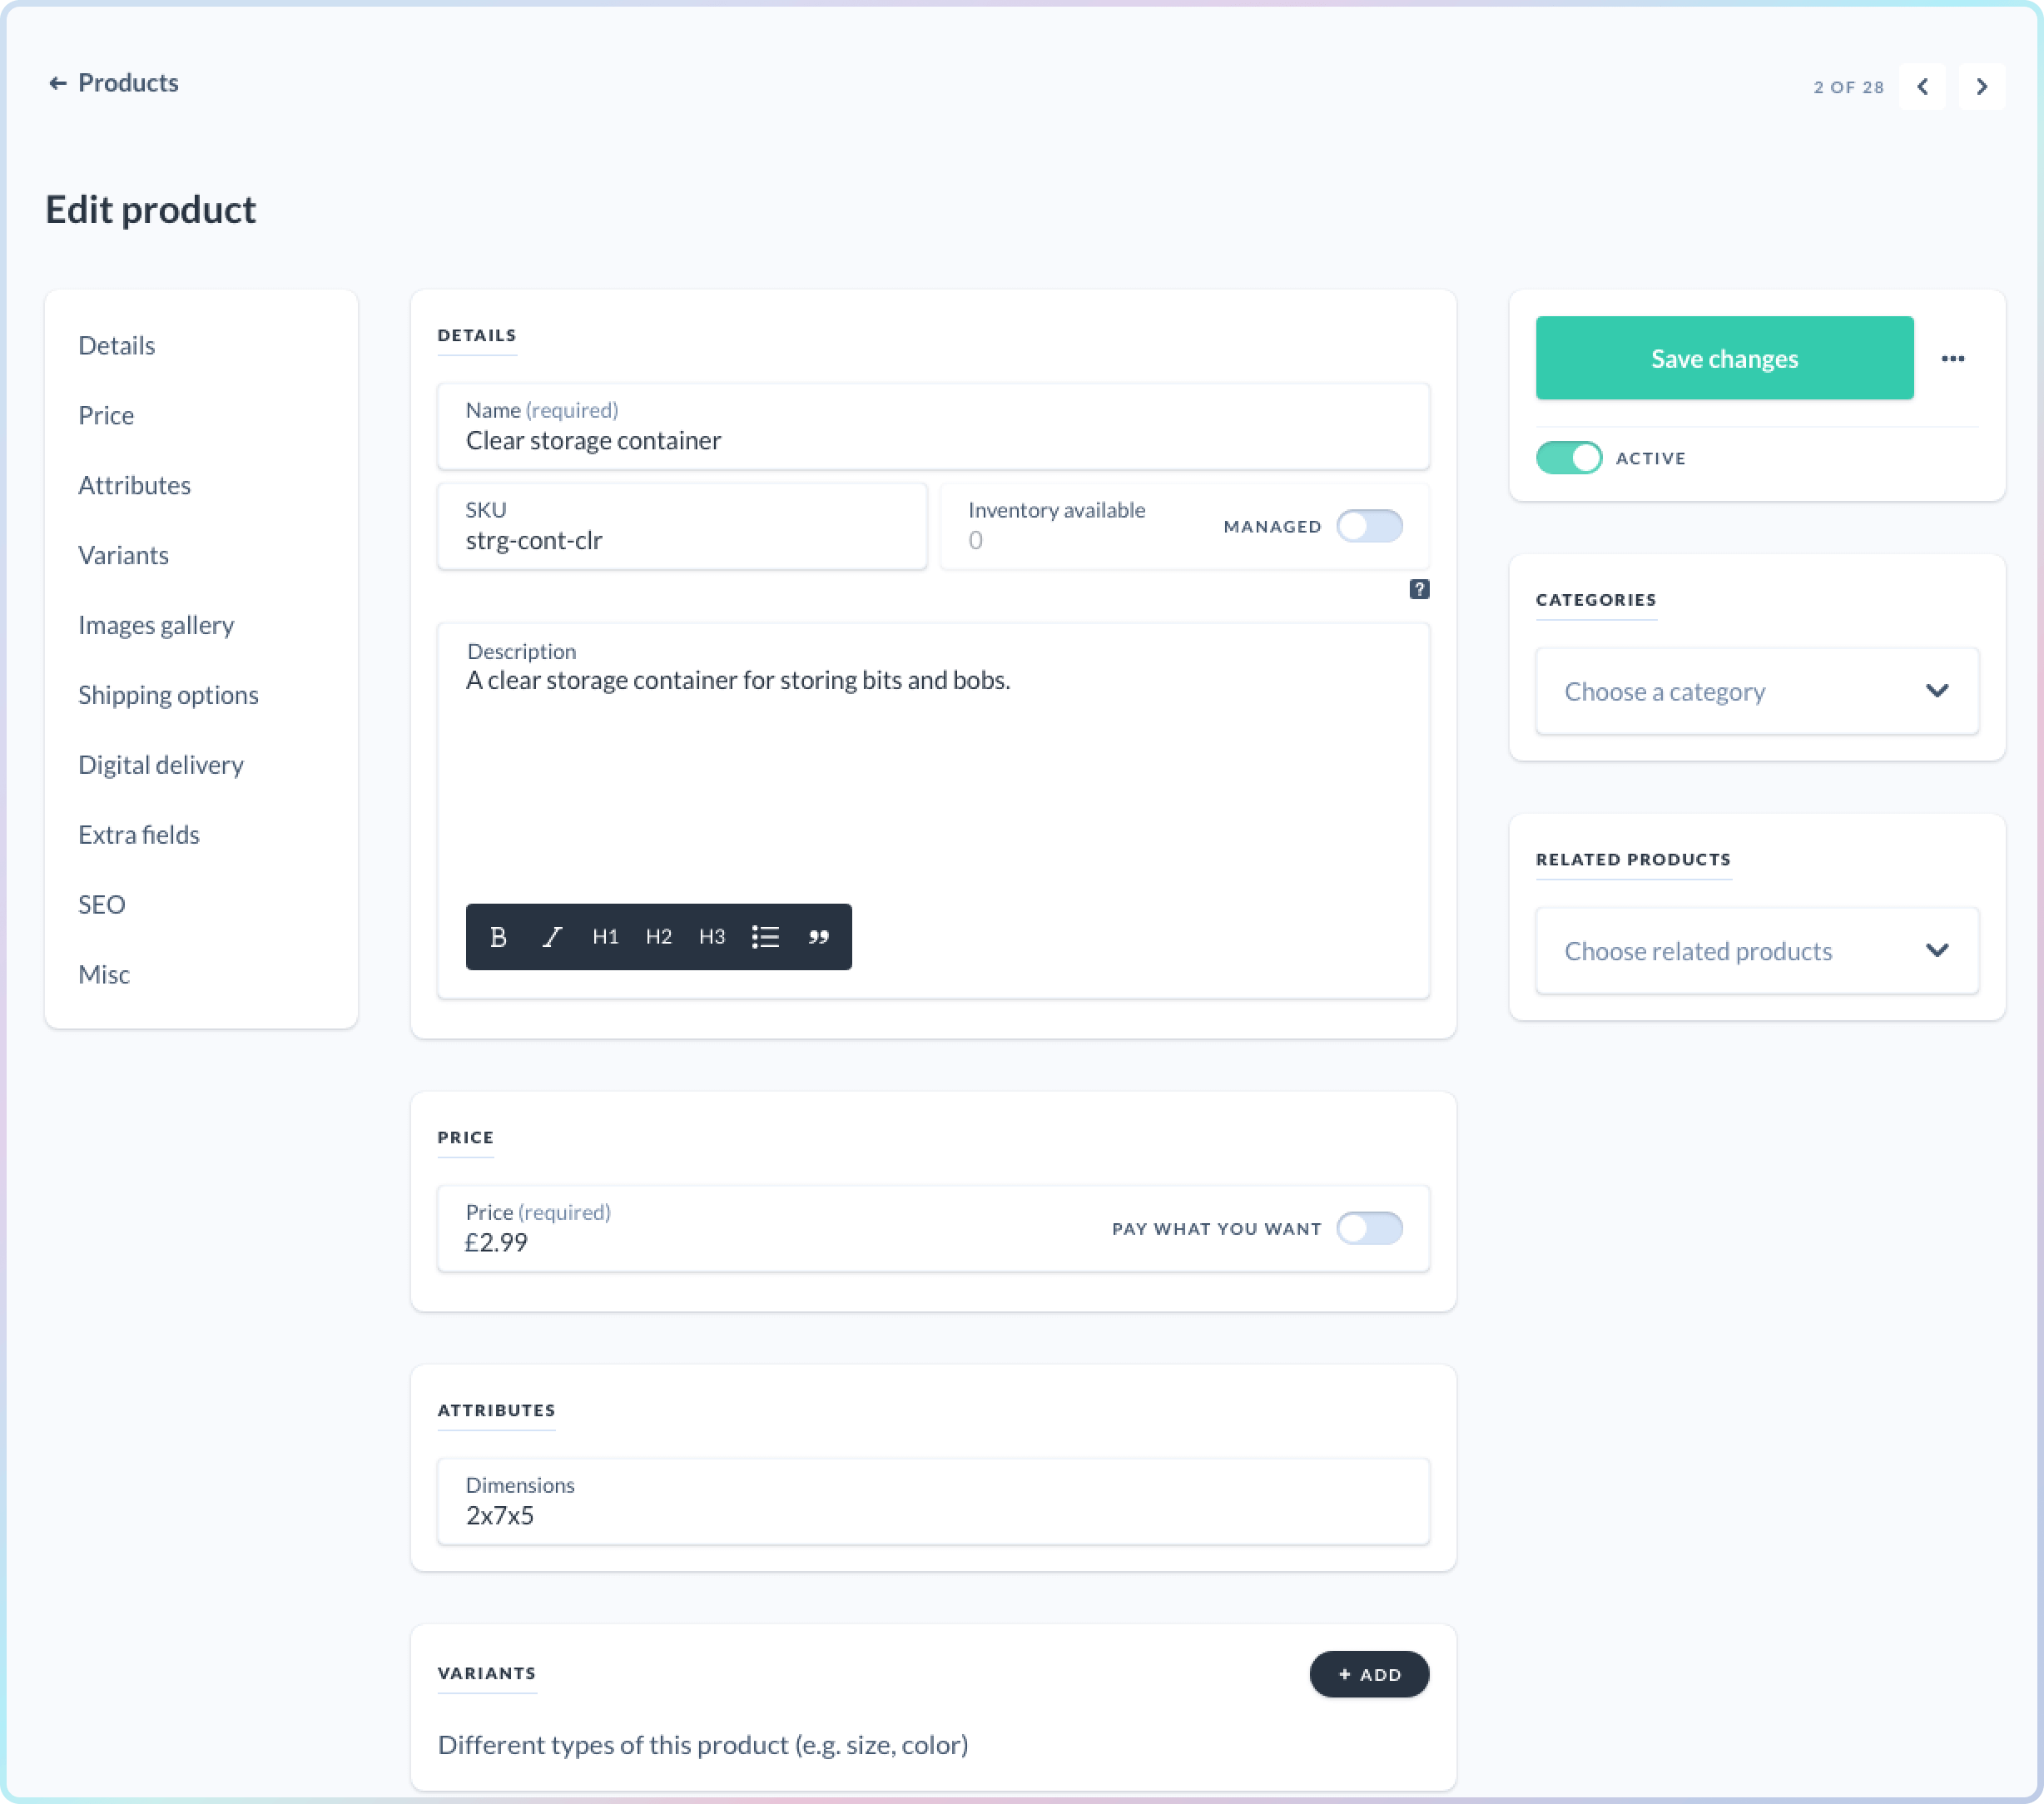
After adding an attribute, a new card will appear on the product edit page underneath the price card. Inside this card you will see all attributes you have created. Simply fill in any attributes your product requires and you’re done!
 You can also update attributes on a product by using the "update product" API endpoint. See the documentation for further details.
How do I use product attributes on my eCommerce site?
Once you’ve set up your attributes and set them on the product, you will be able to access them from the product's endpoint. Below is an example of what your products JSON may look like with a few attributes enabled.
{
  "active": true,
  "assets": [],
  "attributes": [{
    "id": "attr_mL1vOoZW5Ra8Ze",
    "name": "Show product in featured category",
    "value": "checked",
    "meta": null
  }, {
    "id": "attr_gNXELwjrw3A4px",
    "name": "Manufacture date",
    "value": "2021-11-04",
    "meta": null
  }, {
    "id": "attr_jr2LM5QrlZV1gP",
    "name": "Weight",
    "value": "10grams",
    "meta": null
  }],
  "name": "Clear storage container",
  "sku": "clr-strg-cntr",
  "description": "",
  "inventory": {
    "managed": false,
    "available": 192
  },
  "price": "3.99",
  "conditionals": {
    "is_active": true,
    "is_tax_exempt": false,
    "is_pay_what_you_want": false,
    "is_inventory_managed": false,
    "is_sold_out": false,
    "has_digital_delivery": false,
    "has_physical_delivery": false,
    "has_images": true,
    "collects_fullname": false,
    "collects_shipping_address": false,
    "collects_billing_address": false,
    "collects_extra_fields": false
  },
  "sort_order": 0,
  "thank_you_url": null,
  "permalink": "plVN2G",
  "extra_fields": [],
  "collects": {
    "fullname": false,
    "shipping_address": true,
    "billing_address": false,
    "extra_fields": false
  },
  "fulfillment": {
    "digital": [],
    "physical": []
  },
  "seo": {
    "title": null,
    "description": null
  },
  "variants": null,
  "variantGroups": [],
  "categories": [],
  "related_products": [],
  "last_updated": null,
  "id": "prod_bO6J5avd8lEjpK"
}
Let’s assume you have created a number of attributes to list product features on your product. Below is a code example of how you may go about listing all the attributes on a products page. Note, the second map will differentiate between string/number based attributes and options based attributes.
// File: pages/products/[permalink].js
export async function getStaticProps({ params }) {
  const { permalink } = params;
  const product = await commerce.products.retrieve(permalink, {
    type: 'permalink',
  });
  return {
    props: {
      product,
    },
  };
}
function ProductPage({ product }) {
  return (
    <div>
      <h1>{product.name}</h1>
      <p>{product.price.formatted_with_symbol}</p>
      <h4>Description</h4>
      <div dangerouslySetInnerHTML={{ __html: product.description }} />
      <h3>Product features</h3>
      <ul>
        {products.attributes.map((attribute) => (
          <li key={attribute.id}>
            <span>{attribute.name}</span>:
            {!Array.isArray(attribute.value)
                ? attribute.value
                : attribute.value.map((value) => value)}
          </li>
        )}
      </ul>
    </div>
  );
}
export default ProductPage;
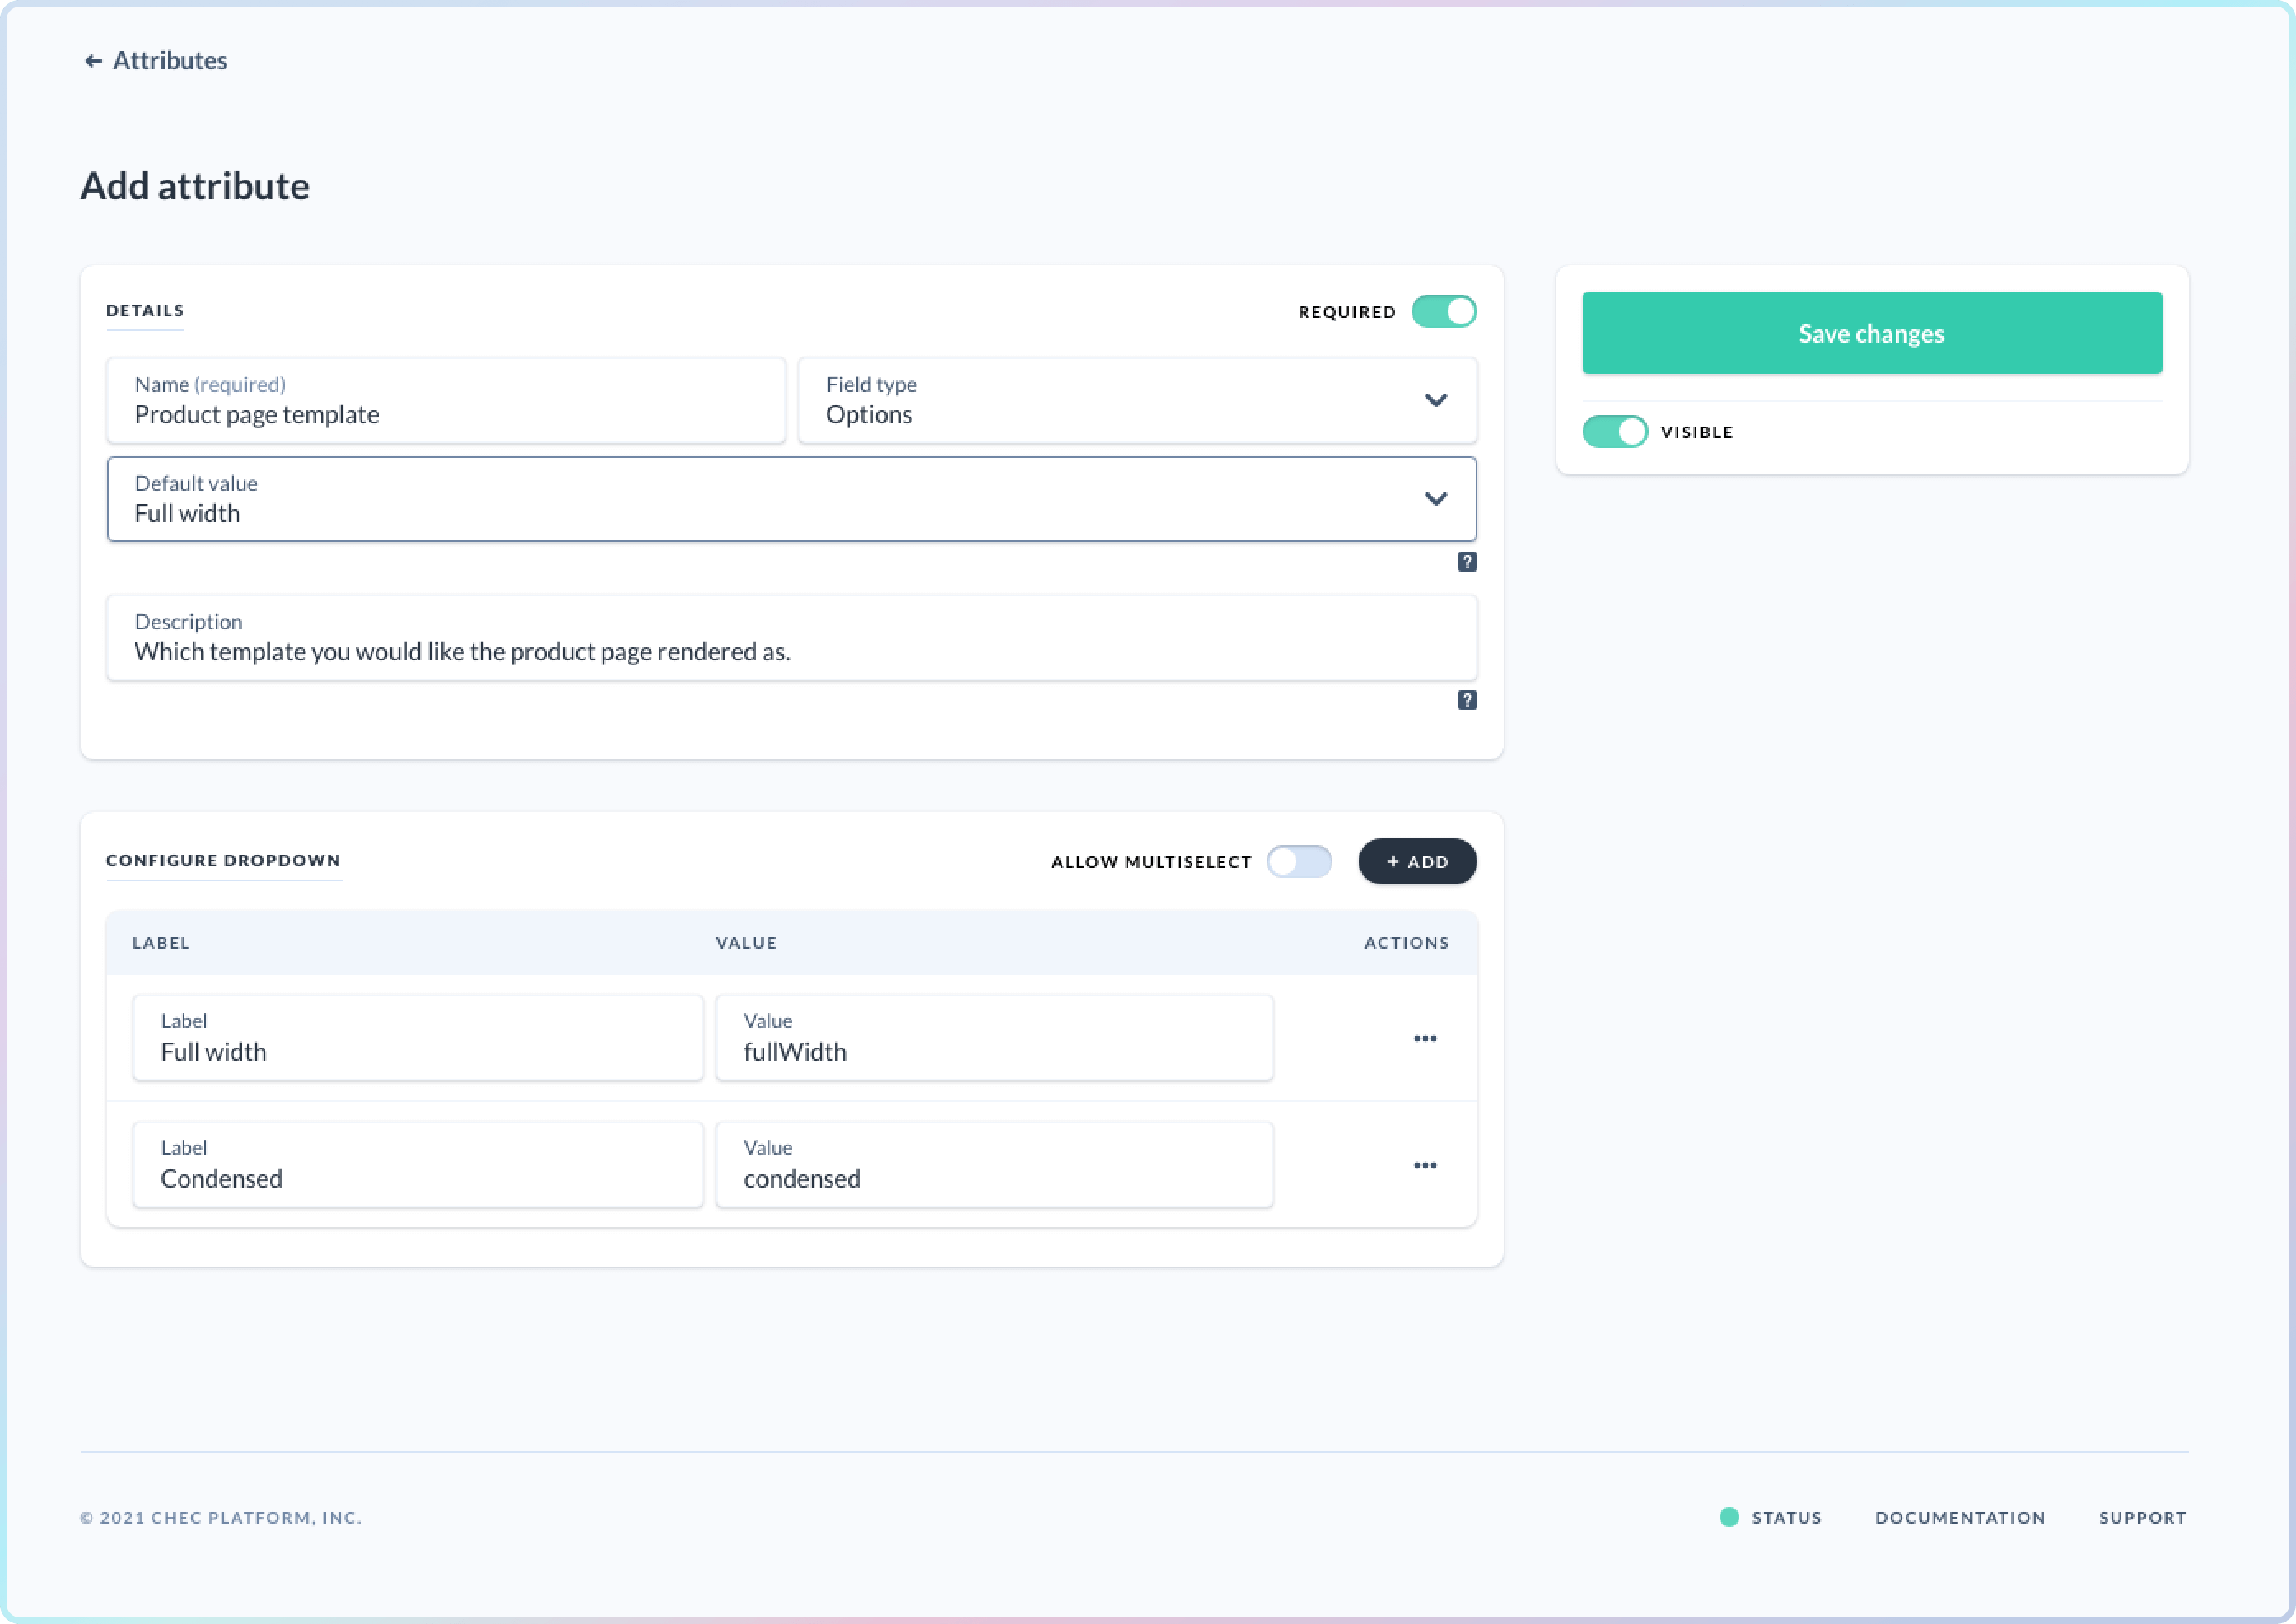
Another possible use for attributes is controlling elements on your product page. Let’s assume you have two different product page templates. One where the image takes up the left column of a page and another where the image is full width with the copy below. Using attributes we can easily add a toggle to products to which template you want.
First let’s create a toggle switch in the dashboard with two options and a default of full width.
 For our product template page, we can now display different templates depending on the selection made. Below is an example of how you may go about this.
// File: pages/products/[permalink].js
import ProductDetailsCondensed from '@components/product/ProductDetailsCondensed';
import ProductDetailFull from '@components/product/ProductDetailFull';

export async function getStaticProps({ params }) {
  const { permalink } = params;
  const product = await commerce.products.retrieve(permalink, {
    type: 'permalink',
  });
  return {
    props: {
      product,
    },
  };
}
function ProductPage({ product }) {
  // Lets get the template attribute based on the id.
  const template = product.attributes.filter(
    (attribute) => attribute.id === 'attr_6bWZ3l8ewkpEQO'
  );
  // Check if the full width template is selected,
  // fall back to the condensed template
  if (template.value[0] === 'fullWidth') {
    return (
      <ProductDetailFull
        key={product.id}
        product={product}
      />
    );
  }
  return (
    <ProductDetailsCondensed
      key={product.id}
      product={product}
    />
  );
}
export default ProductPage;
As you can see in the example above, we are filtering out the attribute that contains our template option. We can then do a check to see which template is shown and render the product page accordingly.
What’s next?
This release makes customizing your product models that much easier. That’s only the start though. We’re planning to open up the attributes to other data models in the future such as categories and customers.
Attributes can be added to any data model type, so what would you like to see attributes added to next? In addition to new attribute models, are there any other attribute types you’d like to see? Let us know, we’re excited to see what you can make with attributes!
Ready to take control of your commerce?
Leverage our headless backend to build product, cart, and checkout experiences as per your requirements.
Speak to our expert team or sign up for free today.