Manage transactional emails for your store with SendGrid

 How you communicate with the customer, defines your brand in the mind of the customer. Transactional email receipts and order status emails need to be on-brand and informative, ensuring customer perception perfectly aligns with customer experience.
Commerce.js provides out-of-the-box support for transactional emails so you can get selling fast. However we also encourage businesses to take their emails a step further by connecting to a best-of-breed email API provider. This gives brands granular control over the design and data they included in their customer emails.
In this blog, we’ll create a custom email receipt template with SendGrid using webhooks.
What are transactional emails?
Transactional emails consist of receipts, login details, order status updates, and any other message that is triggered by an action.
For this example we will create a custom receipt email containing relevant information such as the customer’s name, shipping address, order details, order items, and total amount that was paid.
The receipt email is typically the first transactional email your customer receives, making it important to get right and be on-brand. Using an email API like SendGrid, will allow you to send on-brand, beautiful emails to customers.

Configuring custom emails
To set this all up we will:
- Disable the in-built email notifications from the Chec Dashboard
- Create a serverless Netlify function to run the SendGrid API call. This serverless function will be handled privately and not exposed on the client side
- Configure an
orders.createwebhook to trigger when a customer makes an order which will subsequently call the serverless function and the SendGrid API
 For this example, we’ll be using a Next.js example project, creating the serverless function using the built-in API routing functionality in Next.js. The serverless function is essentially acts as an API endpoint for us to communicate with and receive a response from, all handled server side.
Let’s get started
This quick guide assumes you have your basic local environment set up along with an active Chec and SendGrid account. You will need to obtain both your Chec API keys and SendGrid API keys. When you have those prerequisites, you can either start this implementation by creating a serverless function with one of your projects or use the Commerce.js example storefront to integrate.
This guide will not cover building a custom SendGrid template. We will only cover how to accept a request from Chec, verify it, and then send the order response to SendGrid. It is up to you to handle the customization of the email in the SendGrid application. We will attach a few links with basic steps of how you might set up a dynamic template in your SendGrid account.
Disable emails that are sent from Chec
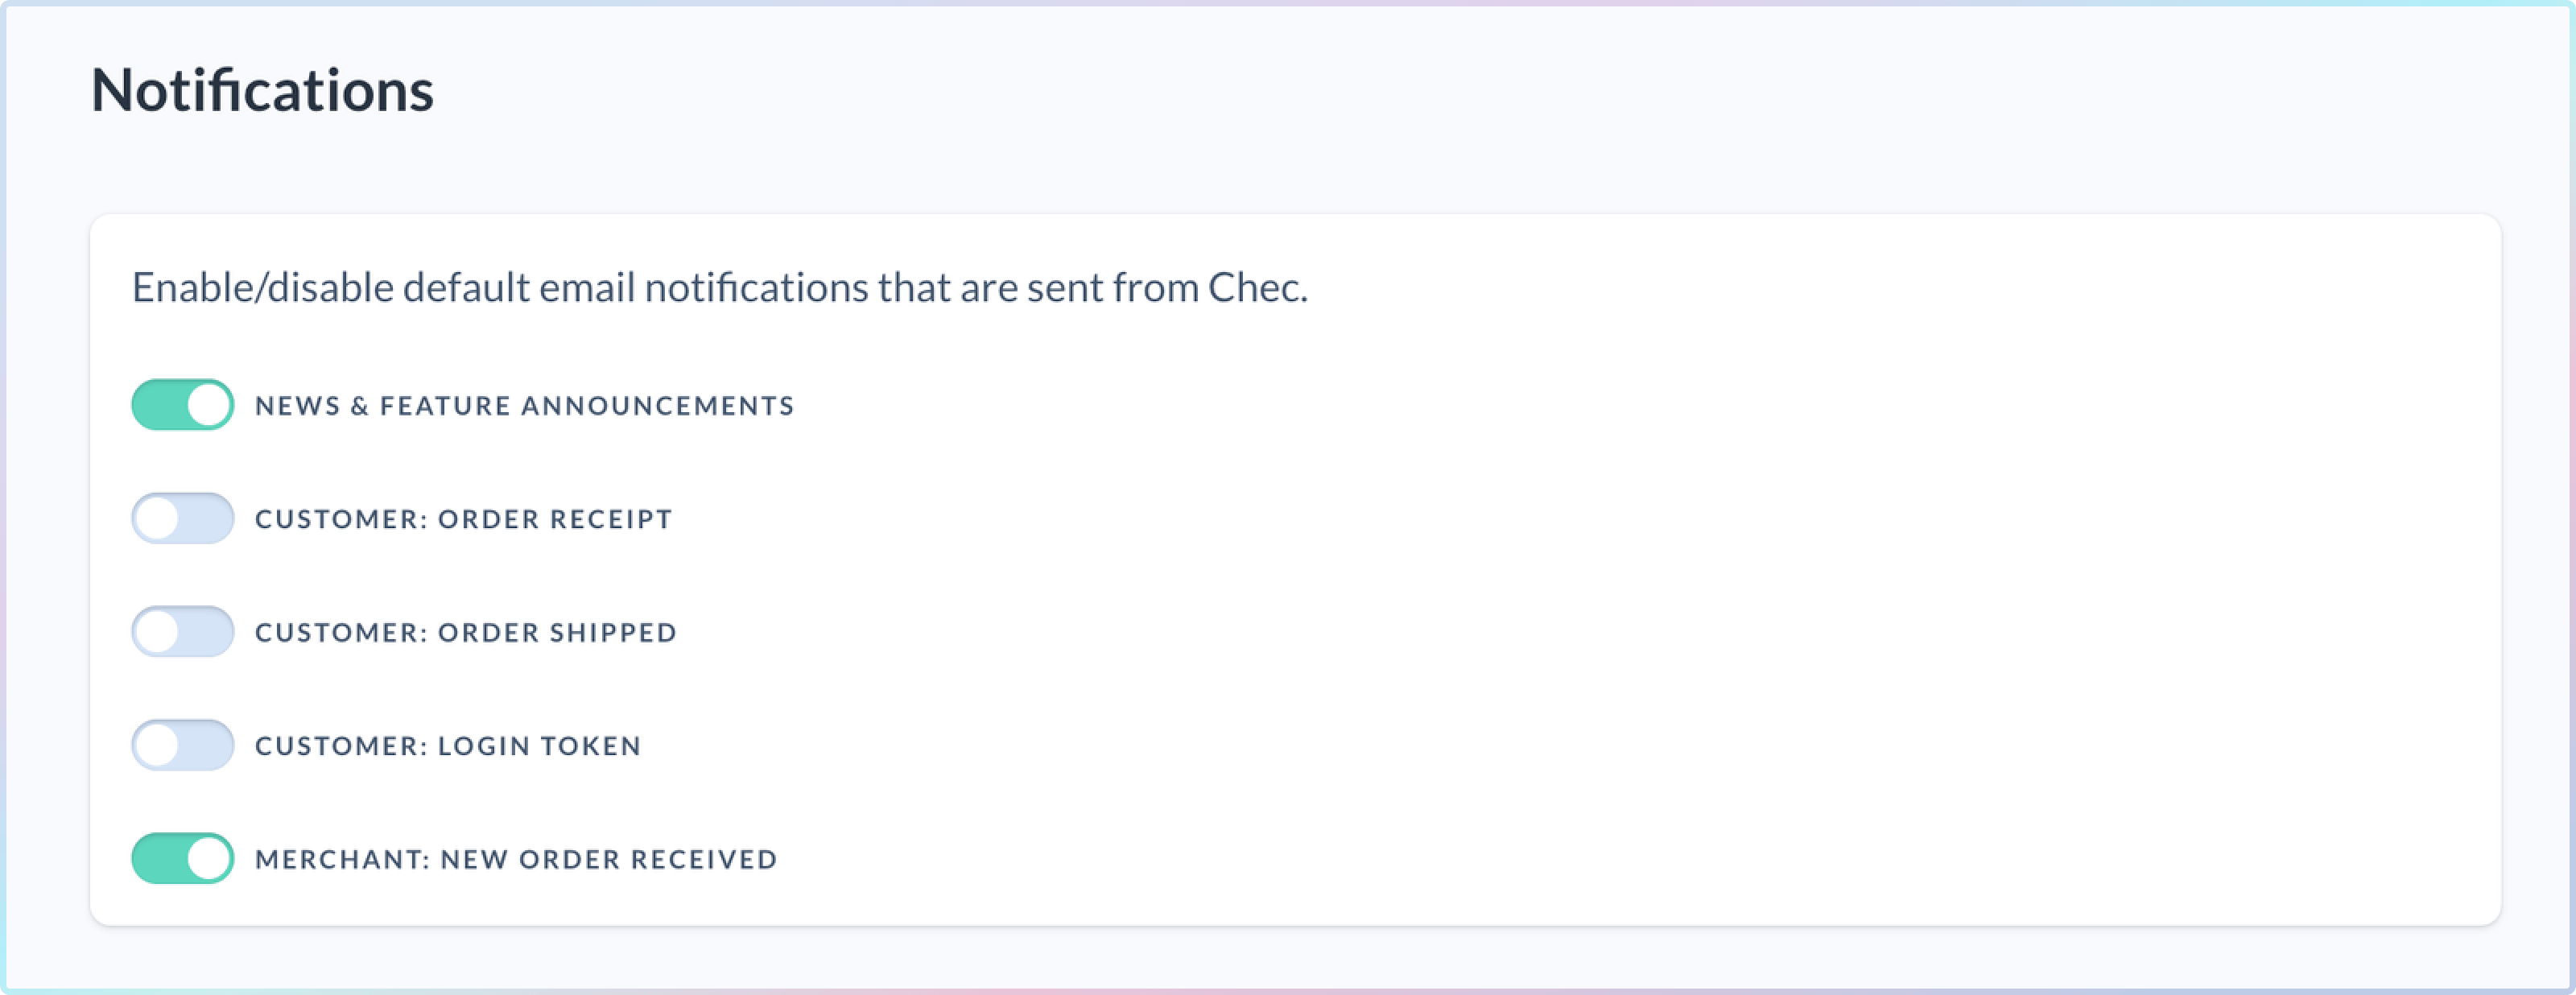
Since you will be creating custom emails using an external email service, SendGrid, you will need to disable all the customer emails from the Chec server. Go to Settings > notifications and disable the three available customer toggles.
Implementation
These are code references only and may not include all the code necessary to create a complete email template. There are numerous ways to send transactional emails with SendGrid, please read SendGrid’s documentation to integrate according to your needs.
Start by installing the example storefront project or use one of your existing projects.
# Clone the Commerce.js Next.js demo store
git clone [email protected]:chec/commercejs-nextjs-demo-store.git custom-email-example

# Change directory into the project and install dependencies
cd custom-email-example && yarn

# Install the SendGrid mail SDK to use the SendGrid Web API v3 Mail Send endpoint
# https://docs.sendgrid.com/api-reference/mail-send/mail-send
# https://github.com/sendgrid/sendgrid-nodejs/tree/main/packages/mail
yarn add @sendgrid/mail
Create a new folder functions and a file named email.js inside of it. This is the file where you will be creating your email API endpoint.
app
├── components
├── lib
├── lotties
├── functions
│   ├── email.js
└── pages
// ...
Create your serverless function in the file email.js
// Create the API endpoint function with a req and res parameter
export default async function handler(req, res) {
    if (!req.body || req.httpMethod !== 'POST') {
        return {
            status: 405,
            headers,
            body: JSON.stringify({
                status: 'Invalid HTTP method',
            }),
        }
    }

    const { data } = JSON.parse(req.body);

    // Request for your merchant information so that you can use your email
    // to include as the 'from' property to send to the SendGrid API
    const merchant = fetch(`${process.env.CHEC_API_URL}/v1/merchants`, {
        headers: {
            'X-Authoriza†ion': process.env.CHEC_SECRET_KEY,
        },
    }).then((response) => response.json);

    // Extract the signature from the registered `orders.create` webhook
    const { signature } = data;

    delete data.signature;

    // Verify the signature
    const expectedSignature = crypto.createHmac('sha256', webHookSigningKey)
        .update(JSON.stringify(data))
        .digest('hex');
    if (expectedSignature !== signature) {
        console.error('Signature mismatched, skipping.')
    }

    // Verify the age of the request to make sure it isn't more than 5 minutes old.
    if (new Date(data.created * 1000) < new Date() - 5 * 60 * 1000) {
        console.error('Webhook was sent too long ago, could potentially be fake, ignoring');
    }

    // Because you will need to list out the order line items, map through the returned line items
    // and structure out the data you need to display in the email receipt for your customer
    // Note that we are keeping the data structure minimal here
    const orderLineItems = data.payload.order.line_items.map((lineItem) => ({
        text: lineItem.product_name,
        price: lineItem.line_total.formatted_with_symbol,
    }));

    // Signature is verified, continue to send data to SendGrid
    // Create the email object payload to fire off to SendGrid
    const emailPayload = {
        to: data.payload.customer.email,
        from: merchant.support_email,
        subject: `Thank you for your order ${data.payload.customer.firstname}`,
        text: `Your order number is ${data.payload.customer_reference}`,
        // SendGrid expects a JSON blog containing the dynamic order data your template will use
        // More information below in 'What's next?' on how to configure your dynamic template in SendGrid
        // The property key names will depend on what dynamic template you create in SendGrid
        dynamic_template_data: {
            total: data.payload.order.subtotal.formatted_with_symbol,
            items: orderLineItems,
            receipt: true,
            name: data.payload.shipping.name,
            address01: data.payload.shipping.street,
            city: data.payload.shipping.town_city,
            state: data.payload.shipping.county_state,
            zip : data.payload.shipping.postal_zip_code,
        },
        // In addition to specifying the dynamic template data, you need to specify the template ID. This comes from your SendGrid dashboard when you create you dynamic template
    // https://mc.sendgrid.com/dynamic-templates
        template_id: '{template_id}'
    }

    let response = {};
    try {
        // Call the SendGrid send mail endpoint
        response = await sgMailClient.send(emailPayload);
        return {
            statusCode: 200,
            headers,
            body: 'Email sent!'
        }
    } catch (err) {
        console.error('Error', err)
    }
    // Return the response from the request
    return res.status(200).json(response);
}
In the above serverless function, you have achieved the following:
- Instantiated the SendGrid email client and passed in your API key.
- Extracted the “signature” from the request body. The signature is a hash of the payload’s contents, which was generated using your Chec webhook “signing key”.
- Verify the signature by calculating what the signature should be, then compare it against what we were provided. For security reasons, it’s important to verify the signature of incoming webhooks and ensure they come from Chec, and not a man-in-the-middle attack.
- Verified the age of the request. Another good thing to check is that the request was recently created. Chec will send you webhooks in near real-time, so requests are unlikely to be older than say 10-20 seconds.
- Created the email payload. We need to extract the order data and structure to send as an email payload to SendGrid’s API. The structure will depend on what dynamic template you have created in SendGrid.
- Send the email payload in the SendGrid’s request. We load up the SendGrid mail client SDK, tell it where to send the email, what the email body should contain, and which email it should come from (your merchant email in this case).
Netlify serverless functions make it almost effortless to create a function on the server that is executed based on an event, which the webhook will handle. After you’ve created your function, you’ll need to deploy the site to Netlify so that you can use your live site’s URL with the email endpoint.
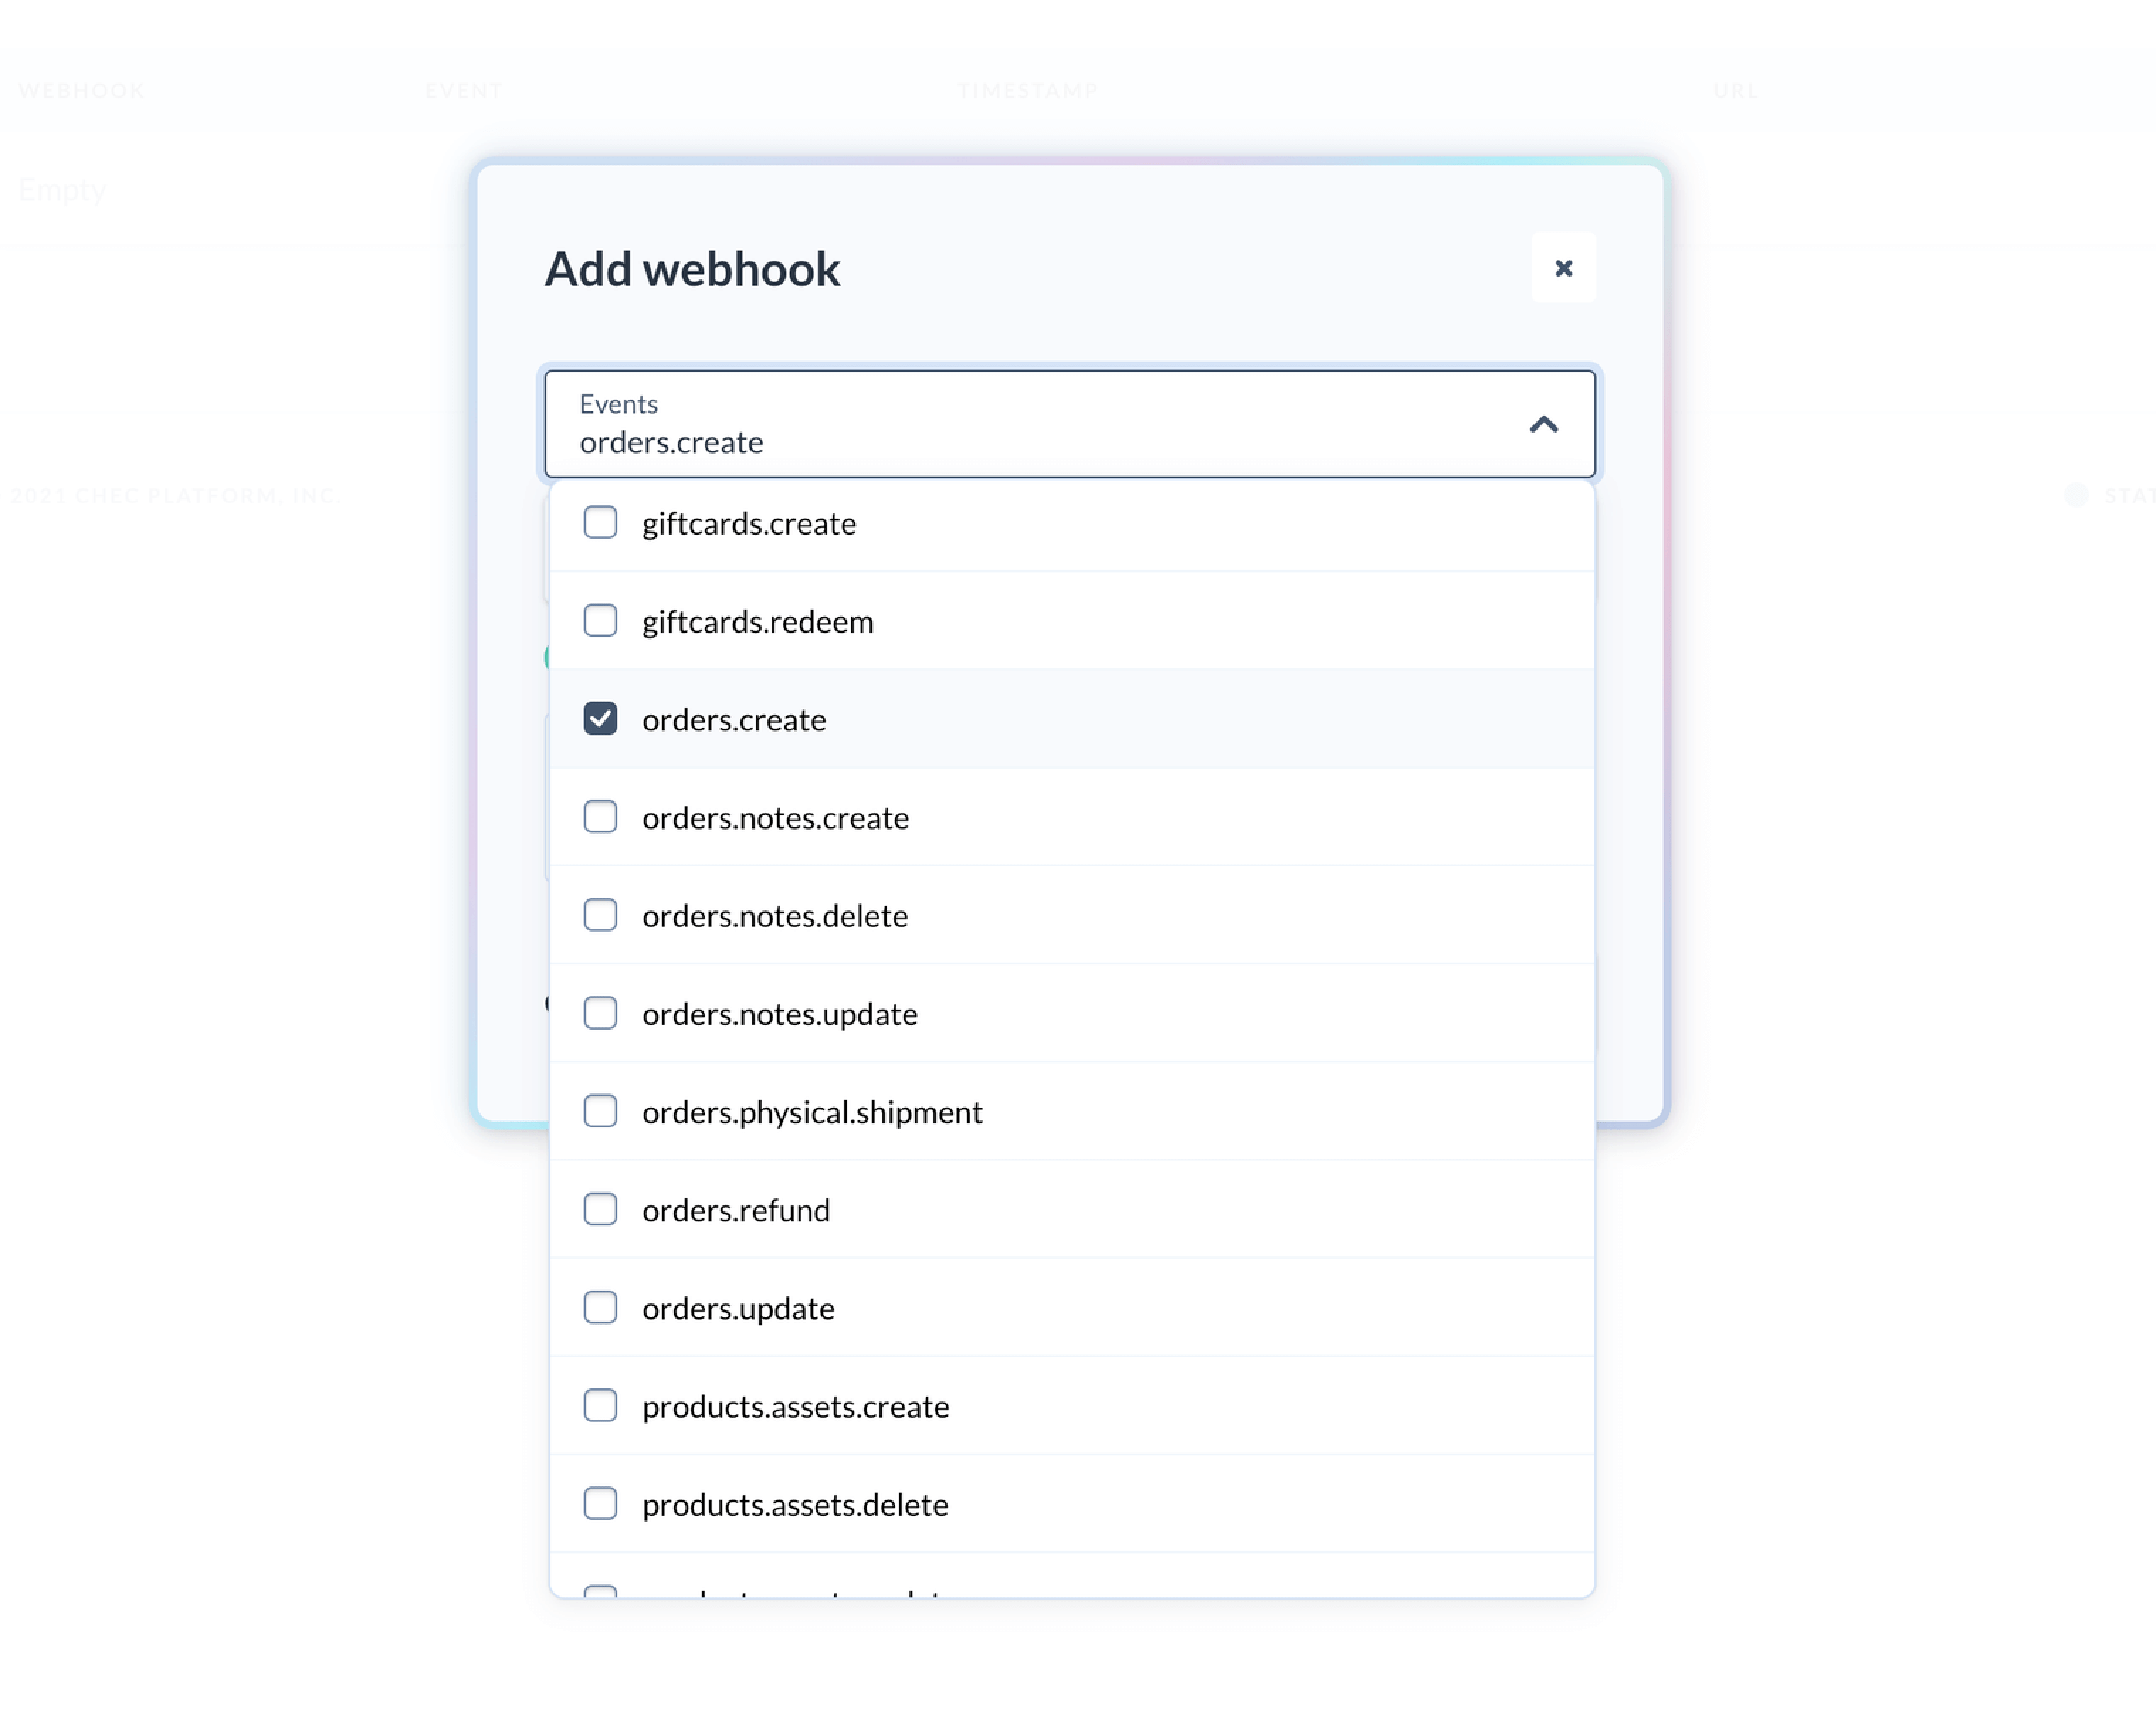
Now let’s go to your Chec dashboard Settings > Webhooks, to register a webhook for the orders.create event to fire the email endpoint created above.
Input your URL as https:/
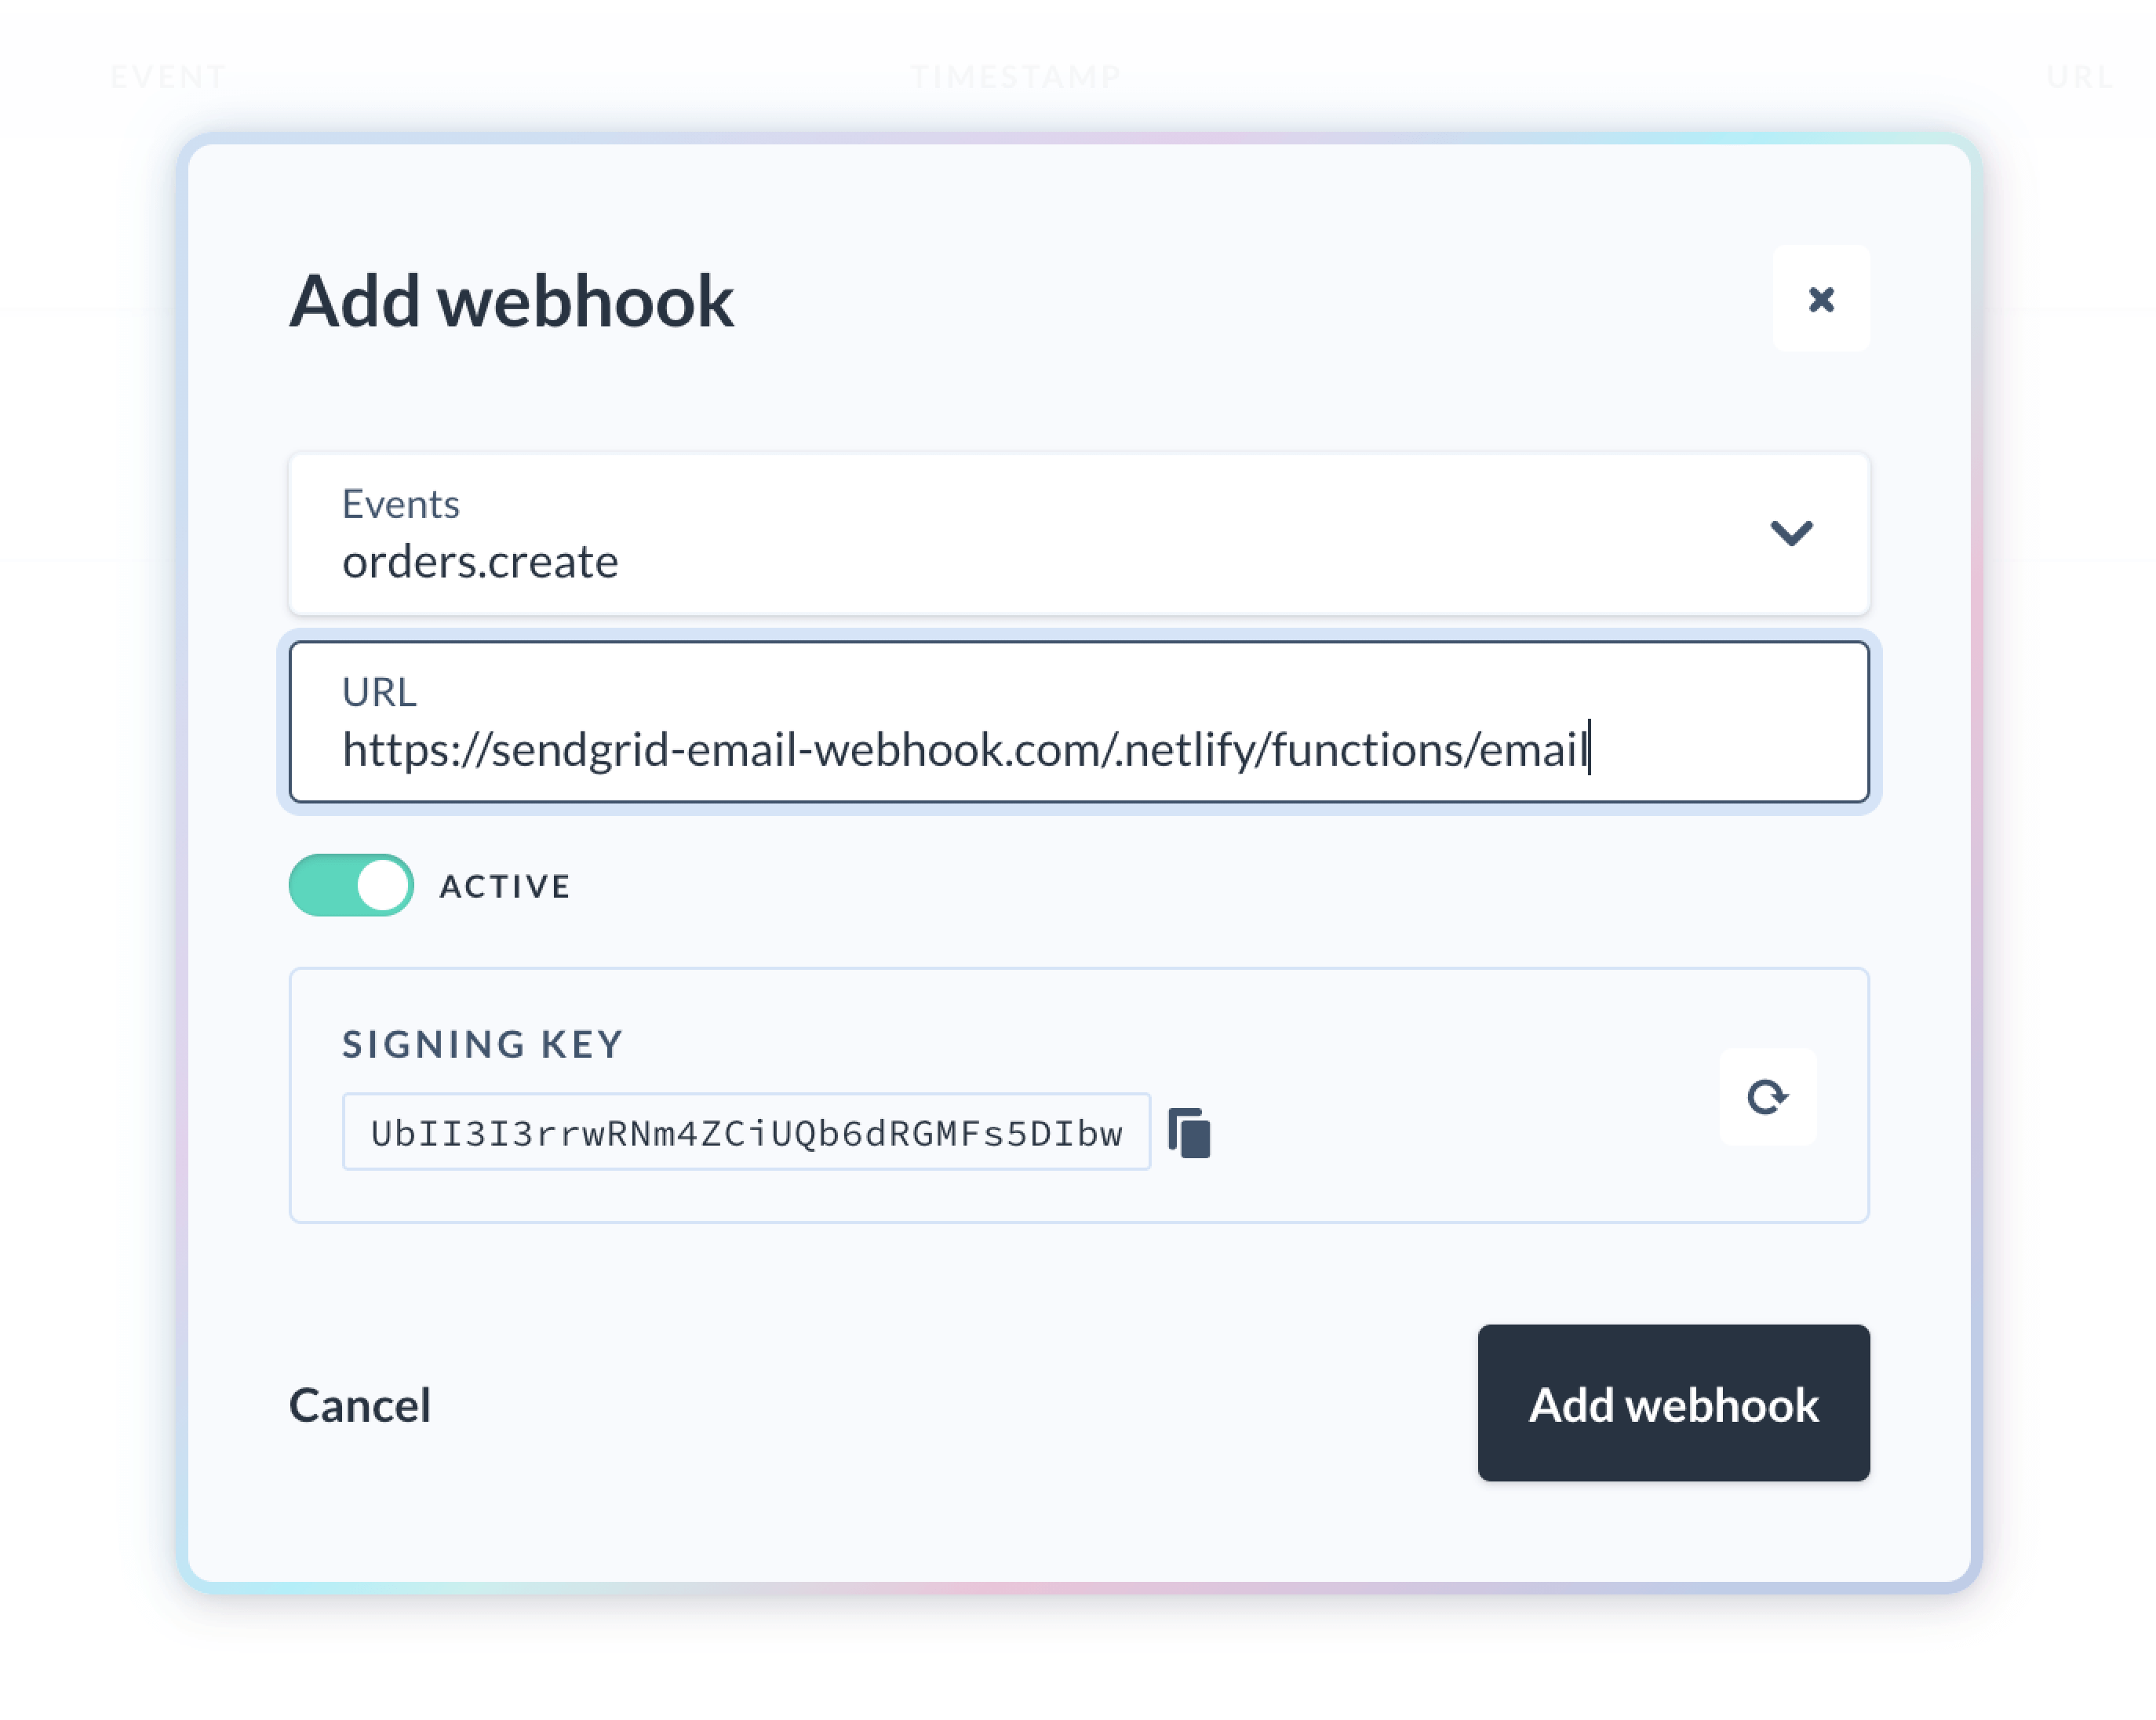
Be sure to copy your signing key and go back to email.js to replace the value of the webHookSigningKey variable.
// Your Chec webhook signing key, from the Chec Dashboard webhooks view
const webHookSigningKey = 'UbII3I3rrwRNm4ZCiUQb6dRGMFs5DIbw';
Now click ‘Add webhook’ to save your webhook. At this stage, you should be able to test your serverless function by making a test order and inputting your email as the customer email. When an order is created, you will be sent an email with the data you included in the email payload.
Next Steps
Sending the payload in plain JSON does not format the email. You will need to create a dynamic template in SendGrid and send the order data as a transactional email receipt. Follow the steps in the SendGrid documentation linked above to configure a dynamic email template.
And there you have it, you can now create transactional emails that are fully customized with your own design, and data.
Resources and Community
Check out our documentation and community articles.
Join our community on Slack to connect with eCommerce developers from around the world. Share your projects with us, ask questions, or just hang out!