This guide will walk you through how to use Nuxt.js to list products on a page with the Commerce.js SDK.
Overview
The purpose of this guide is to help developers get familiar with using the Commerce.js SDK in conjunction with Nuxt.js. Commerce.js is a powerful eCommerce tool that gives you the ability to build custom eCommerce sites without the trouble of building out a lot of the complex functionality that comes with eCommerce projects. Commerce.js makes it easy for developers of all levels to build a fully customized online store.
Note: This guide uses v2 of the Commerce.js SDK
This guide will cover:
- Create a CommerceJS plugin within your Nuxt App
- Render products server-side with Nuxt
- List your products in a Nuxt application
Requirements
- IDE of your choice
- Commerce.js SDK
- Yarn or npm
- Nuxt.js
- Vuetify
- create-nuxt-app
Prerequisites
Basic knowldge of Nuxt.js and JavaScript are required for this guide.
- Nuxt.js
- JavaScript(ES6)
Getting started
1. Create a Chec account and create products
It should be noted that there are two main components, Chec (dashboard) and Commerce.js SDK. Think of Chec as the logic layer, the source of all your customer data, transactions - things of that nature. Think of the SDK as your way to communicate with your data. You'll need to create an account HERE - once logged in, navigate to products. The only product data you need to get started is: Name, Image, Price, Description.
2. Initializing a Nuxt project
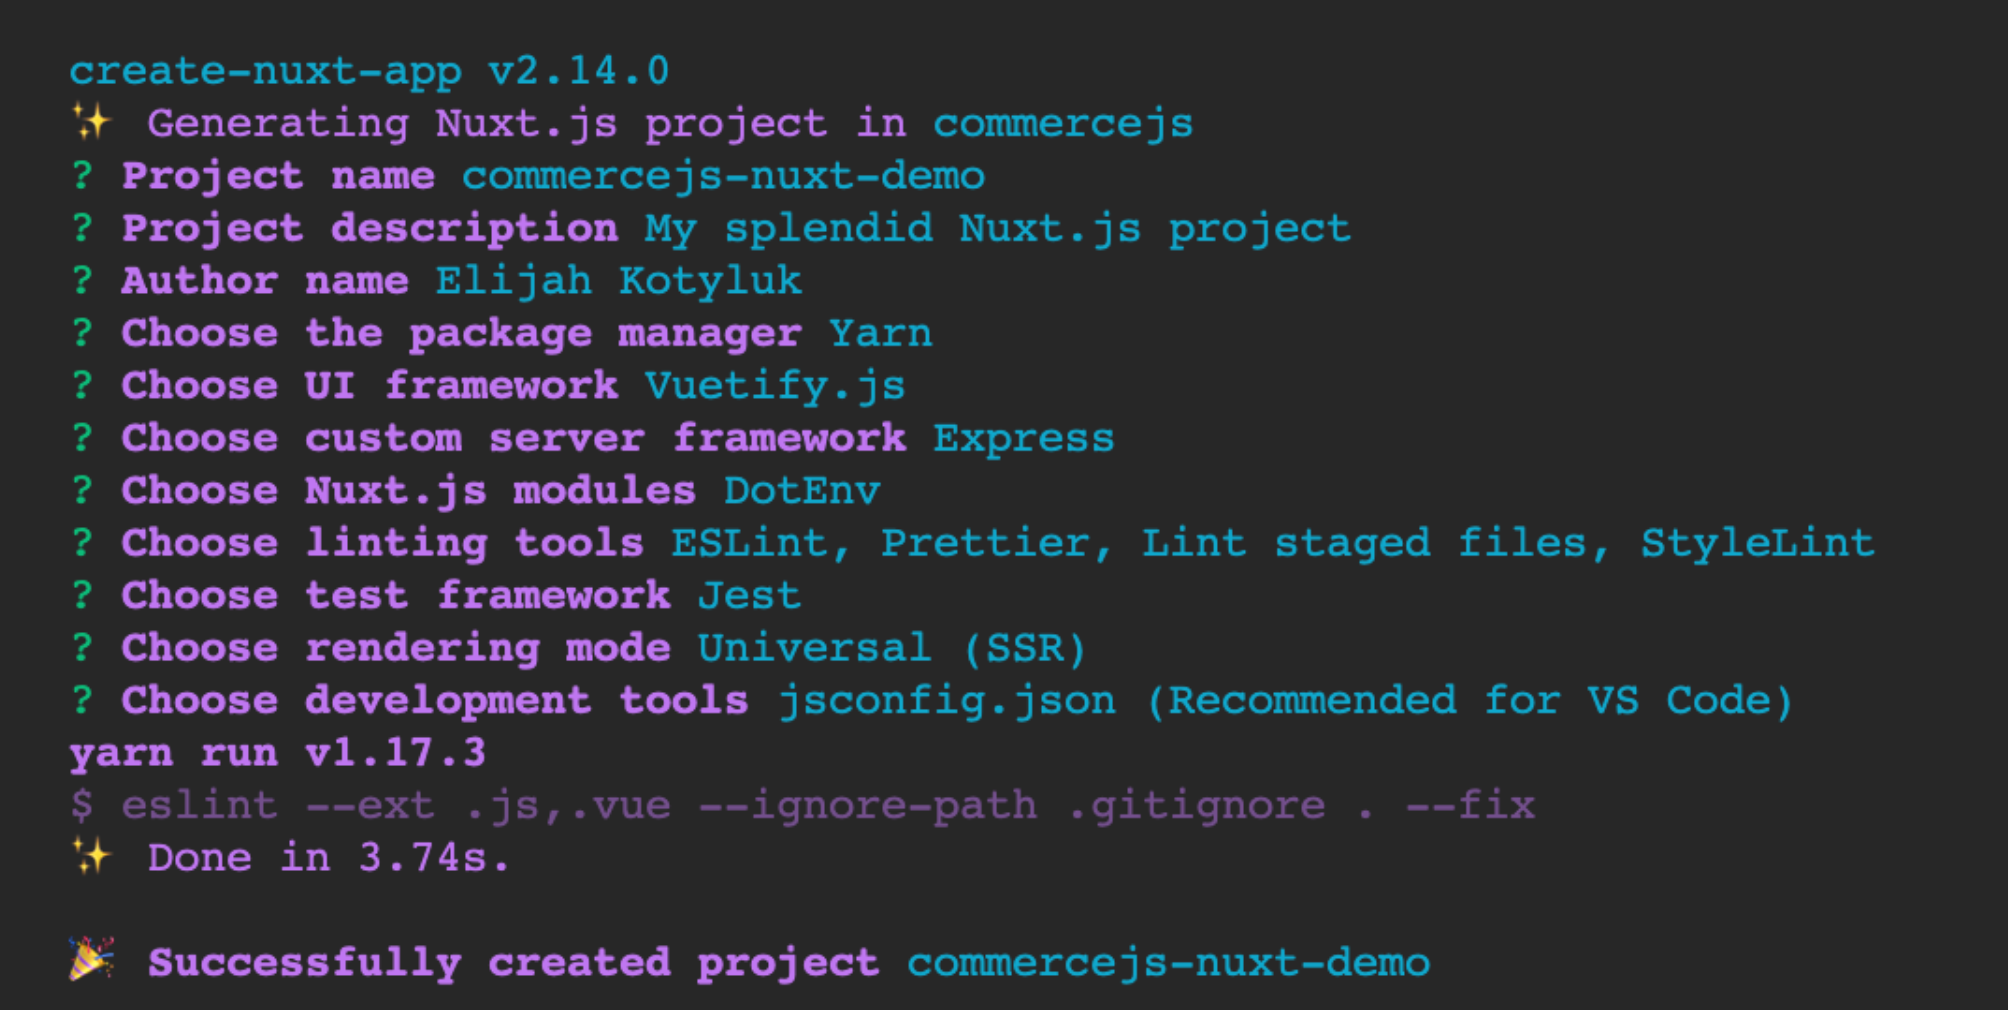
To get started with Nuxt, I recommended checking out their installation guide and using the create-nuxt-app scaffolding tool to quickly spin up your project. Below I will list the options I chose when creating this guide.
// npx: shipped by default since npm v5.2.0
npx create-nuxt-app <project-name>

// Yarn
yarn create nuxt-app <project-name>
3. Installing Commerce.js
Use the Commerce.js SDK to access the Chec API data from your application.
Installing via SDK
// yarn
yarn add @chec/commerce.js

// npm
npm install --save @chec/commerce.js
4. Create a minimal Nuxt plugin with the Commerce.js SDK
Create a new file in the plugins directory of your Nuxt app called commerce.js. You will begin this file by importing the Commerce.js SDK at the top of the file, followed by importing Vue. Next, inject the Commerce.js SDK with your API key into the Vue instance by setting a new property on the Vue instance called $commerce, which will allow you to access the Commerce.js SDK through Vue's instance globally. Once you've done this, all features of Commerce.js will be accessible on your Vue instance. Don't forget to add your new plugin's path to the plugins property located in the nuxt.config.js file of your project root so that Nuxt can inject it when building.
// plugins/commerce.js
import Commerce from '@chec/commerce.js'
import Vue from 'vue'

Vue.prototype.$commerce = new Commerce(process.env.COMMERCEJS_API_KEY, true)
// nuxt.config.js
module.exports = {
    // ...
    css: [],
    plugins: ['~/plugins/commerce.js'],
    buildModules: [],
    // ...
}
5. Create a file in your store directory called index.js
In your newly created store/index.js file you'll import Vue so that you can utilize your new plugin that has been injected into the Vue instance. Once this is done, create your Vuex store's state, which will contain an empty array of products by default.
Next, you will create your store's actions, which will contain a special action specific to Nuxt.js - nuxtServerInit(): This action gets called and fills your store with data on the server-side before rendering. This action is asynchronous and will wait for the list of products to be returned from the Commerce.js SDK.
Upon returned results, the action will commit the product data by calling the setProducts mutation and passing products.data, setting your state's products to the returned products list. The last little piece for the store is to write a getter that simply returns the state's list of products when called from your component.
// store/index.js
import Vue from 'vue'

export const state = () => ({
  products: []
})

export const actions = {
  async nuxtServerInit({ commit }) {
    const products = await Vue.prototype.$commerce.products.list()

    // Pass products.data
    commit('setProducts', products.data)
  }
}

export const mutations = {
  setProducts(state, payload) {
    state.products = payload
  }
}

export const getters = {
  products() {
    return state.products
  }
}
6. Create a CommerceItem.vue component file under your components directory.
The components/CommerceItem.vue component will be used as a dynamic template to display the data for each item in your products list. First, create your script tag that exports a name and the props of your Vue component. Your component's props will contain a product object where you will explicitly set it's type and default key/value property pairs. Next, create a basic template that contains some Vuetify components that can be used as a starting point to style and render each individual product's data.
// components/CommerceItem.vue
<template>
  <v-card max-width="300">
    <v-card-title>
      {{ product.name }}
    </v-card-title>

    <v-divider class="mb-3"></v-divider>

    <v-img :src="product.media.source" />

    <v-divider class="mt-3 mb-1"></v-divider>

    <v-card-action>
      <span>${{ product.price.formatted }}</span>
    </v-card-action>
  </v-card>
</template>

<script>
export default {
  name: 'CommerceItem',
  props: {
    product: {
      type: Object,
      default: () => ({
        id: '',
        media: null,
        name: '',
        price: ''
      })
    }
  }
}
<script>
7. Use the CommerceItem.vue component and Vuex's mapGetters to display your product list.
Inside your pages directory should live an index.vue file, if you used create-nuxt-app then you'll want to delete all the default filler code provided by the CLI. Inside of the component's script tag import the mapState function, followed by the CommerceItem.vue component and be sure to add CommerceItem to the components property of components/index.vue.
Next, we will utilize the ...mapGetters function inside of the component's computed() properties, and use the products getter to return your products in state. Finally, create a simple template that uses Vue's v-for directive to dynamically render each of your store's products.
// pages/index.vue
<template>
  <v-layout column justify-center align-center>
    <v-flex xs12 sm8 md6>
      <v-row>
        <template v-for="product in products">
          <v-col :key="product.id">
            <commerce-item :key="product.id" :product="product" />
          </v-col>
        </template>
      </v-row>
    </v-flex>
  </v-layout>
<template>

<script>
import { mapState } from 'vuex'
import CommerceItem from '~/components/CommerceItem'

export default {
  components: {
    CommerceItem
  },
  computed: {
    ...mapGetters({ products: 'products' })
  }
}
</script>
8. Run your app!
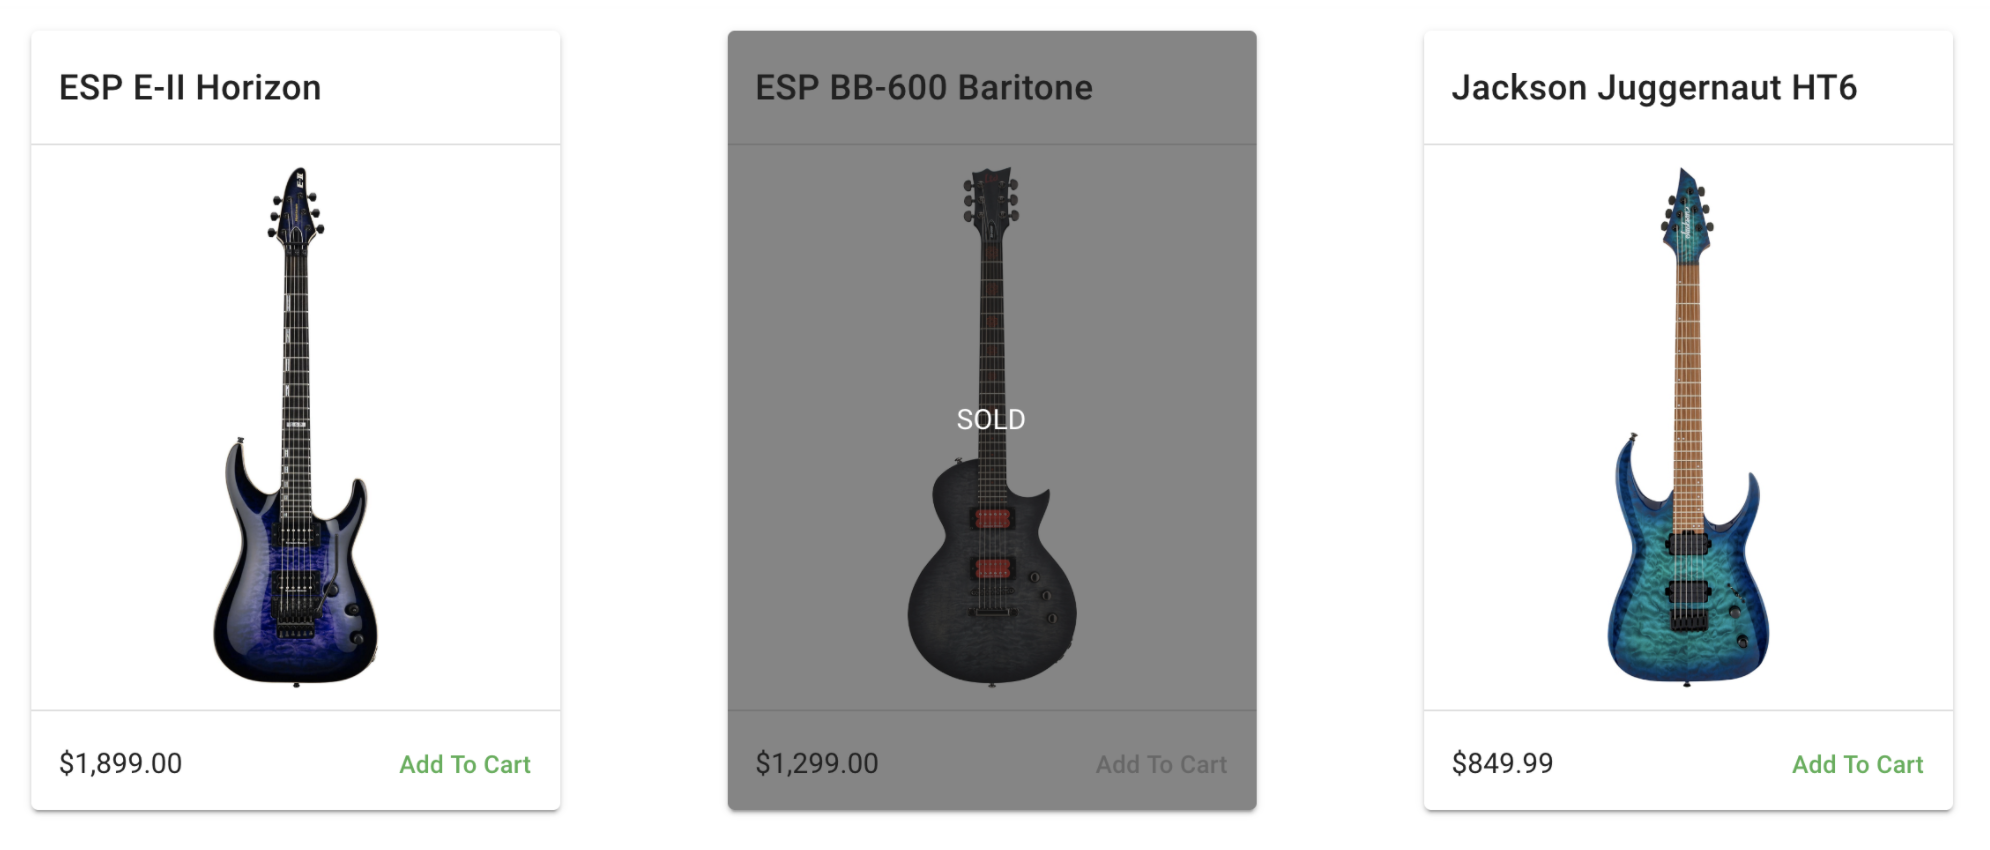
You should now be able to run your Nuxt application and see the products from your store display.
// yarn
yarn dev

//npm
npm run dev
Hooray, you've listed products!
Nice work, you've successfully listed your products using Nuxt.js.
Let's review what we have accommplished in this guide:
- Created a Chec account and added products
- Initialized a Nuxt application
- Injected a simple Vue plugin utilizing Commerce.js SDK
- Created a simple Vuex store and rendered your data server-side using nuxtServerInit()
- Listed your products in your Nuxt application
This guide continues onto (Adding products to a cart with Nuxt.js and Commerce.js) Adding products to cart.